
Every website your child visits — games, school portals, even ItsMyBot’s own pages — is built with two core building blocks: HTML and CSS. Learning HTML and CSS for kids is often the very first step into real, text-based coding, and it’s far more approachable than most parents expect.
This guide explains what HTML and CSS actually are, how kids learn them step-by-step, and how to help your child build their very first web page with confidence.
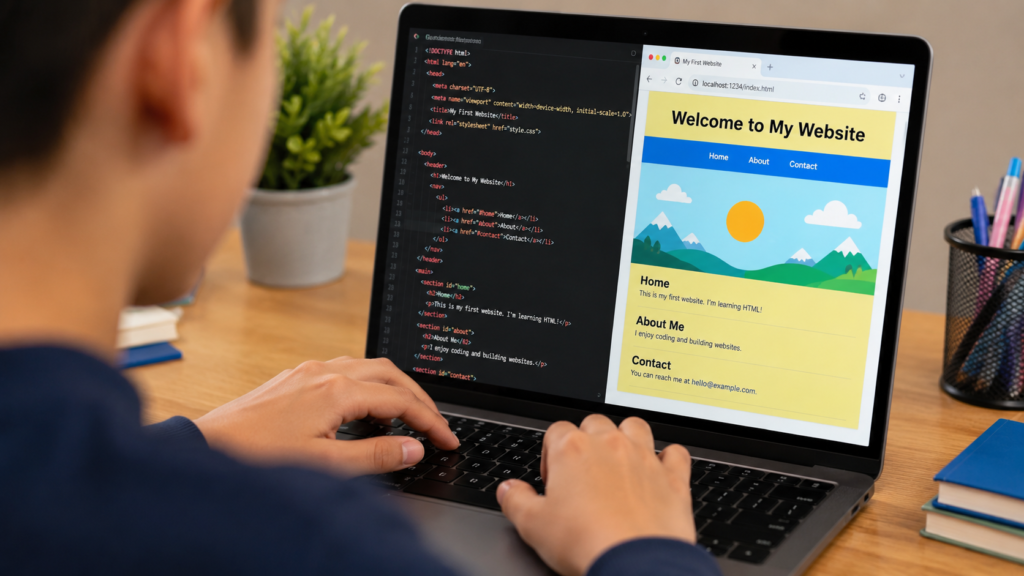
HTML (HyperText Markup Language) builds the structure of a webpage — headings, paragraphs, images, and buttons. CSS (Cascading Style Sheets) controls how that structure looks — colors, spacing, fonts, and layout.
Think of HTML as the skeleton of a room and CSS as the paint, furniture, and lighting. Kids quickly grasp this because the results are visual and immediate — change one line, see the page change instantly.
Our step-by-step breakdown in how to write HTML code in 7 steps is a great first hands-on resource for beginners.
This progression — from structure, to style, to interactivity — mirrors the natural path many of our students follow toward our creative web design course for kids.
Ages 8–9: Kids can begin exploring simple HTML tags with guided support, especially if they’ve already built confidence through block-based coding. See our guide for 8-year-olds and 9-year-olds.
Ages 10–11: This is often the sweet spot — kids are comfortable reading longer instructions and enjoy customizing their own web pages. Explore paths for 10-year-olds and 11-year-olds.
Ages 12+: Older kids and teens can move quickly through HTML and CSS fundamentals and start layering in JavaScript, working toward full-stack development.
If you’re unsure whether your child is ready, our guide on signs your child is ready to learn coding offers a helpful checklist. Kids who haven’t tried block-based coding yet often start with our Scratch programming course for kids before moving into HTML and CSS.
ItsMyBot also groups its full course catalog by age tier, so you can browse everything available at each stage: Little Coder for our youngest learners, Junior Coder for kids building real web and app projects, and Senior Coder for teens ready for advanced, publish-ready work.
Kids often ask, “Why do I need both?” Here’s the simplest way to explain it:
| HTML | CSS | |
|---|---|---|
| Job | Builds structure and content | Controls appearance and style |
| Example | Adds a heading and a button | Makes the heading blue and the button rounded |
| Beginner Feel | “Building blocks” | “Decorating the room” |
| Learned First? | Usually yes | Follows shortly after |
Our guides on centering an image in HTML, fixing a broken layout in HTML, and using the blockquote tag are excellent hands-on practice pieces once your child understands the basics.

Step 1: Learn the basic HTML tags. — Why it works: Understanding headings, paragraphs, and images gives kids the vocabulary to build anything.
Step 2: Build a simple, structure-only page. — Why it works: Seeing raw structure first (before styling) helps kids understand what HTML and CSS each actually do.
Step 3: Add a CSS stylesheet. — Why it works: This is often the most exciting step — plain text suddenly becomes colorful and styled.
Step 4: Adjust colors, fonts, and spacing. — Why it works: Small, safe experiments build confidence fast, since mistakes are easy to undo.
Step 5: Add a small interactive touch, like a button. — Why it works: This naturally opens the door to JavaScript and further learning — see var, let, and const in JavaScript for what comes next.
❌ Mistake 1: Starting with CSS before HTML basics are solid. Why it’s problematic: Without structure, style has nothing meaningful to shape. ✅ Correct approach: Build structure first, then style — always in that order.
❌ Mistake 2: Overloading kids with too many tags at once. Why it’s problematic: It turns an exciting subject into memorization. ✅ Correct approach: Introduce a few tags per session, reinforced through our analog clock using HTML, CSS, and JavaScript style hands-on projects.
❌ Mistake 3: Skipping real projects in favor of only tutorials. Why it’s problematic: Tutorials without application rarely stick long-term. ✅ Correct approach: Encourage kids to build something personal — a page about their pet, hobby, or favorite game.
❌ Mistake 4: Assuming HTML/CSS is “too technical” for younger kids. Why it’s problematic: This often delays a genuinely accessible entry point into coding. ✅ Correct approach: With the right guided pace, most 9- and 10-year-olds handle it comfortably.
Scenario A — The First-Timer (Age 9): Has some block-coding experience through our Scratch programming course for kids, ready to try real text-based code for the first time. ✅ Best fit: Guided HTML basics with visual, immediate feedback.
Scenario B — The Growing Builder (Age 11): Comfortable with HTML tags, ready to explore CSS styling and simple layouts. ✅ Best fit: Our creative web design course for kids, which layers CSS onto existing HTML skills.
Scenario C — The Ready-for-More Teen (Age 13): Confident with HTML and CSS, curious about adding interactivity. ✅ Best fit: Our JavaScript course for kids, progressing toward full-stack development. <div style=”background: rgba(14,42,138,0.88); border-radius:12px; padding:36px 32px; text-align:center;”>
From a blank page to a real, styled site — with a mentor guiding every step.
At ItsMyBot, HTML and CSS are taught through live, personalized mentorship, not passive video tutorials. Every student works at their own pace, building real pages instead of copying pre-written code.
Depending on your child’s stage, we recommend:
Families often pair web design learning with our weekend classes, after-school programs, or summer coding camp for kids to fit around the school calendar. You can also browse our full catalog by age tier — Little Coder, Junior Coder, and Senior Coder — to find the right starting point.
Most kids can begin around age 8–9 with guided support, though 10–11 is often the sweet spot for independent progress. See our best age for kids to start coding guide for more detail.
Not necessarily, though prior exposure through our Scratch programming course for kids can make the transition to text-based code smoother.
HTML builds the structure of a webpage — headings, text, images. CSS styles that structure — colors, fonts, and layout. They always work together.
Most kids move next into JavaScript to add interactivity, and eventually toward full-stack development.
Yes. Many students build personal pages — about a hobby, pet, or interest — as their first real project in our creative web design course for kids.
It’s different, not necessarily harder. Text-based code requires more precision, but the logic builds directly on what kids already learned through block-based tools.
Most kids see their first visible change — like a color or font update — within their very first session, which is part of what makes HTML and CSS so motivating early on.
HTML and CSS give kids their first real taste of professional coding — with fast, visible results that keep motivation high. From structuring a simple page to styling it with color and layout, every small win builds toward genuine technical confidence.
Getting this foundation right matters, because HTML and CSS quietly underpin nearly every other coding path a child might take next, from JavaScript to full app development.
If your child is ready to build their first website, explore our creative web design course for kids or book a free demo to find the right starting point together.

Online coding, AI, and robotics classes that help kids ages 6–18 build real skills — and confidence — one project at a time.
No commitment · Live class with an expert teacher
© ItsMyBot 2026. All Rights Reserved.