Creating a maze game in Scratch is one of the most exciting and educational projects for young programmers. Whether you’re a parent looking to introduce your child to coding or a teacher seeking engaging STEM activities, this comprehensive tutorial will guide you through building an interactive maze game from scratch. With Scratch’s intuitive drag-and-drop interface, you’ll discover how block-based programming makes coding accessible and fun for beginners of all ages.
By completing this Scratch maze tutorial, you’ll master essential programming concepts that form the foundation of game development. Sprites are the characters or objects that perform actions, Events are triggers that start a sequence of actions, Motion blocks control the movement of sprites, Conditionals check if certain conditions are true, and Loops repeat a sequence of instructions. These fundamental concepts will prepare you for more advanced programming languages and projects.
Key Programming Skills You’ll Develop:
Event-driven programming: Understanding how user inputs trigger game actions
Collision detection: Creating boundaries and interactive elements
Sprite management: Controlling multiple characters and objects
Game logic: Implementing win conditions and level progression
Problem-solving: Debugging code and optimizing performance
Getting Started with Scratch
Scratch is a free programming language and online community where you can create your own interactive stories, games, and animations. Developed by MIT Media Lab, Scratch 3.0 offers enhanced features perfect for maze game creation.
To begin your maze game project:
Visit the Official Website: Navigate to scratch.mit.edu and create a free account
Choose Your Development Environment: You can work online through the web browser or download Scratch Desktop for offline coding
Explore the Interface: Familiarize yourself with the stage, sprite area, and code blocks panel
Pro Tip: Make sure to jot down the URL of your Scratch project in progress. It’s a lifesaver when you’re ready to dive back in.
Setting Up Your Maze Project
Before diving into coding, proper planning ensures a smoother development process. Plan your game by deciding on the main theme and elements you want to include.
Step 1: Creating Your Character Sprites
The first step is setting up your character sprites. Based on our project, you’ll need two costumes for your main character.
Costume 1
Costume 2
Creating Your Player Sprite:
Delete the Default Cat: Remove Scratch’s default cat sprite if you want a different character
Choose Your Character: Click the sprite icon and select from Scratch’s library or upload your own image
Create Multiple Costumes: Add costume1 and costume2 for animation effects
Size Adjustment: Ensure your character sprite fits comfortably within maze pathways
Starting Position: Place the sprite at the maze entrance
Programming Movement Controls
Now comes the exciting part—bringing your maze game to life through code! Motion blocks (Blue): These blocks allow you to control the movement of a sprite (character) on the stage.
Step 2: Understanding Motion Blocks
The Motion blocks panel includes essential commands for character movement:
move (10) steps: Moves the sprite forward
turn CW (15) degrees: Rotates the sprite clockwise
go to random position: Teleports sprite to random location
go to x: (-240) y: (-47): Moves to specific coordinates
glide (1) secs to random position: Smooth movement animation
point in direction (90): Sets sprite direction
point towards (mouse-pointer): Sprite follows mouse
change x by (10): Horizontal position adjustment
set x to (-240): Set exact horizontal position
if on edge, bounce: Boundary collision handling
set rotation style [left-right]: Controls sprite rotation behavior
Basic Movement Script Implementation
Start by adding a forever loop and two if statements. We want to check if the up arrow key is pressed, and then change the y position by 2.
scratch
When [green flag] clickedForever If <key [up arrow] pressed?> then Change y by [5] End If <key [down arrow] pressed?> then Change y by [-5] End If <key [left arrow] pressed?> then Change x by [-5] End If <key [right arrow] pressed?> then Change x by [5] EndEnd
Adding Visual and Audio Effects
Step 3: Implementing Looks Blocks
The Looks blocks control how your sprite appears on screen:
say [Hello!] for (2) seconds: Display speech bubbles
think [Hmm…] for (2) seconds: Show thought bubbles
switch costume to (costume2): Change sprite appearance
next costume: Cycle through available costumes
switch backdrop to (light): Change stage background
change size by (10): Adjust sprite size
set size to (100) %: Set exact sprite size
change color effect by (25): Apply color filters
show/hide: Control sprite visibility
go to (front) layer: Manage sprite layering
Step 4: Adding Sound Effects
Sound blocks (Pink): These blocks allow you to play sounds or add music in your program. Essential sound commands include:
play sound (meow) until done: Play complete sound
start sound (meow): Begin sound playback
stop all sounds: Halt all audio
change pitch effect by (10): Modify sound pitch
set pitch effect to (100): Set exact pitch value
clear sound effects: Remove audio modifications
change volume by (-10): Adjust audio volume
set volume to (100) %: Set exact volume level
Event Handling and Game Control
Step 5: Setting Up Events
Events blocks are blocks that control events and the triggering of scripts. Key event blocks include:
when flag clicked: Game start trigger
when (space) key pressed: Keyboard input detection
when this sprite clicked: Mouse click detection
when backdrop switches to (light): Background change trigger
when (loudness) > (10): Audio level trigger
when I receive (next maze): Message broadcasting
broadcast (next maze): Send messages between sprites
broadcast (next maze) and wait: Send message and pause
Step 6: Control Flow Management
Control blocks are blocks that control the flow of your program, such as by repeating a section of code, having code wait before running, or stopping the program.
Essential control blocks:
wait (1) seconds: Pause execution
repeat (10): Loop specific number of times
forever: Infinite loop
if () then: Conditional execution
if () then else: Conditional with alternative
wait until (): Conditional pause
repeat until (): Conditional loop
stop (all): Terminate all scripts
when I start as a clone: Clone initialization
create clone of (myself): Duplicate sprites
delete this clone: Remove clone instances
Implementing Collision Detection
Step 7: Sensing and Interaction
To check if the sprite is touching the walls, use a “touching colour” block and the eyedropper tool to choose what colour to check for.
color () is touching ()?: Advanced color detection
distance to (mouse-pointer): Proximity measurement
ask [What’s your name?] and wait: User input collection
answer: Retrieve user input
key (space) pressed?: Keyboard state detection
mouse down?: Mouse button status
mouse x/y: Cursor position tracking
set drag mode (draggable): Enable sprite dragging
Collision Detection Implementation
scratch
If <key [up arrow] pressed?> then Change y by [5] If <touching color [#000000]?> then Change y by [-5] EndEnd
Important: Make sure each if-statement has the exact same colour! Use the color picker tool to select the exact wall color from your maze backdrop.
Advanced Programming Techniques
Step 8: Mathematical Operations
Operators blocks are the blocks that perform math functions and string handling. Key operators include:
() + (): Addition
() – (): Subtraction
() * (): Multiplication
() / (): Division
pick random (1) to (10): Random number generation
() < (), () = (), () > (): Comparison operators
() and (), () or (), not (): Logical operators
join (apple) (banana): String concatenation
letter (1) of (apple): Character extraction
length of (apple): String length
() contains ()?: String search
() mod (): Modulo operation
round (), abs () of (): Mathematical functions
Step 9: Drawing and Visual Effects
Pen blocks enable creative visual effects:
erase all: Clear all drawings
stamp: Leave sprite impression
pen down/up: Control drawing state
set pen color to (): Change drawing color
change pen (color) by (10): Adjust color properties
set pen (color) to (50): Set exact color values
change pen size by (1): Modify line thickness
set pen size to (1): Set exact line width
Complete Code Structure
Step 10: Main Game Script
The Maze Runner game has a sprite for the player, the maze, and the apple at the end of the maze. Here’s the complete main game logic:
Final Game Setup
Step 11: Stage and Sprite Arrangement
The final setup includes:
Maze Backdrop: Black walls forming the maze structure with white pathways
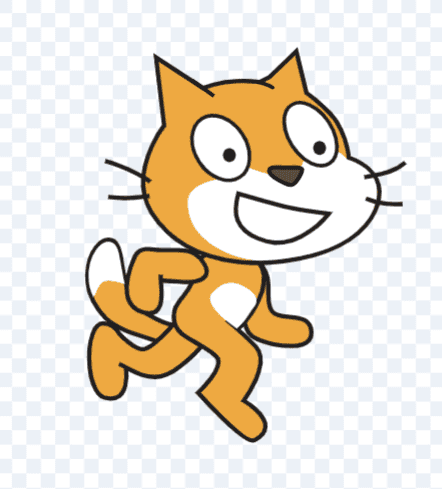
Player Sprite: Orange cat character positioned at the start
Goal Object: Apple sprite placed at the maze exit
Proper Scaling: All sprites sized appropriately for smooth navigation
Creating Multiple Levels
Next, try increasing the number of mazes. Just draw your favorite mazes as costumes, naming them like “Maze3,” and you’re set.
Level Progression System:
Create multiple backdrop costumes with different maze designs
Implement level switching when player reaches the goal
Increase difficulty with each subsequent level
Add visual variety with different themes and colors
scratch
when I receive [level complete]switch backdrop to [next backdrop]go to x: [start x] y: [start y]change [level] by [1]say [Level Complete! Starting Level] join [level]
Advanced Features and Customization
Timer System Implementation
Add time pressure to increase excitement:
scratch
when [green flag] clickedset [time] to [60]repeat until <[time] = [0]> wait [1] seconds change [time] by [-1]endbroadcast [time up]
Scoring Mechanism
Reward players for efficient maze solving:
Time Bonus: Extra points for quick completion
Exploration Penalty: Slight point reduction for backtracking
Perfect Run Multiplier: Double points for no wall collisions
Power-Up Features
These customizations can make the maze game more engaging and personalized.
Introduce temporary abilities:
Speed Boost: Temporary faster movement
Ghost Mode: Brief ability to pass through walls
Map Reveal: Temporary display of the entire maze
Time Extension: Additional seconds for level completion
Testing and Debugging
If your Scratch program doesn’t work and you don’t know how to fix it, you can start over by using the maze-part-c.sb2 Scratch project file. Thorough testing ensures a polished gaming experience.
Common Issues and Solutions
Character Sticks to Walls:
Check collision detection logic
Verify wall color consistency
Adjust movement step size
Inconsistent Movement:
Review key press detection
Check for overlapping scripts
Verify sprite positioning code
Performance Problems:
Reduce script complexity in loops
Optimize collision detection
Minimize visual effects
Beta Testing Process
Self-Testing: Play through all levels multiple times
Peer Review: Have friends or classmates test your game
Feedback Collection: Document suggestions and issues
Iterative Improvement: Implement fixes and enhancements
Final Polish: Add finishing touches and extra features
Tips for Success
Best Practices for Maze Game Development
If you’re a beginner, keep the maze design simple. Start with a few straight paths and avoid overly complex dead ends. You can always add complexity later.
Development Guidelines:
Plan Before Coding: Sketch your maze layout and game flow before starting
Test Frequently: Run your game after each major addition
Use Comments: Add notes to your code blocks explaining their purpose
Start Simple: Begin with basic functionality, then add advanced features
Save Regularly: Keep backup copies of your working project
Learning Resources
Expand your Scratch skills with these educational opportunities:
Official Scratch Tutorials: MIT provides comprehensive learning materials
Educational Content: Incorporate learning objectives like math or science facts
Building Programming Skills
Your maze game project teaches transferable skills valuable for future programming:
Logical Thinking: Breaking complex problems into manageable steps
Debugging Skills: Identifying and fixing code issues systematically
User Experience Design: Creating intuitive and enjoyable interactions
Project Management: Planning, implementing, and completing coding projects
Creative Problem Solving: Finding innovative solutions to technical challenges
Conclusion
Congratulations on completing this comprehensive guide to creating a maze game in Scratch! You’ve learned essential programming concepts including sprite control, collision detection, event handling, and game design principles. Coding a maze helps learn about loops, collision detection, and events while testing memory, problem-solving skills, and patience.
Your maze game represents more than just a fun project—it’s evidence of your growing programming abilities and creative problem-solving skills. Whether you’re continuing with more advanced Scratch projects like how to make a clicker game on Scratch or exploring other programming languages, the foundational skills you’ve developed will serve you well.
Remember, every expert programmer started with simple projects like your maze game. Keep experimenting, learning, and most importantly, having fun with code. The skills you’re developing today will open doors to exciting future opportunities in technology, game development, and creative problem-solving.
Share your maze game creations with friends and family—you’ve earned the right to be proud of your programming accomplishment!
Sandhya Ramakrishnan is a STEM enthusiast with several years of teaching experience. She is a passionate teacher, and educates parents about the importance of early STEM education to build a successful career. According to her, "As a parent, we need to find out what works best for your child, and making the right choices should start from an early age". Sandhya's diverse skill set and commitment to promoting STEM education make her a valuable resource for both students and parents.
Empowering children with the right skills today enables them to drive innovation tomorrow. Join us on this exciting journey, and let's unlock the boundless potential within every child.