Are you ready to dive into the exciting world of game development? Creating a platformer game on Scratch isn’t just fun—it’s a fantastic way to learn coding, spark your creativity, and sharpen your problem-solving skills. But what exactly is a platformer game? Think of classics like Super Mario Bros. or Sonic the Hedgehog—games where you guide a character to jump between platforms, dodge obstacles, and collect items.
Scratch, with its simple drag-and-drop coding, makes it super easy for anyone—especially beginners, kids, and educators—to bring their game ideas to life. Whether you’re a young dreamer building your first video game or a teacher looking for a fun way to introduce programming, this guide has got you covered.
So, are you ready to jump, run, and create something amazing? Let’s get started
Before we dive into creating our platformer, let’s familiarize ourselves with the Scratch interface. Scratch is a visual programming language that uses blocks, sprites, and backdrops to create interactive stories, games, and animations.
To get started, you can either download Scratch from scratch.mit.edu or use the online editor directly on the website.
Figure 1: The Scratch workspace

Now that we’re familiar with Scratch, let’s set up the basic elements of our platformer game.
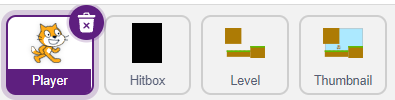
Figure 2: Choosing a sprite for your player character
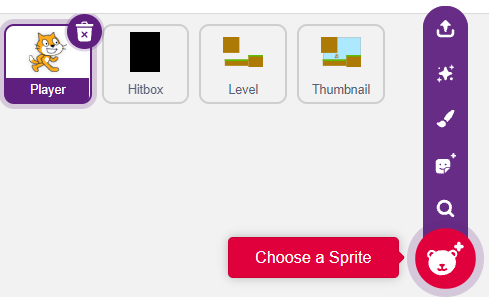
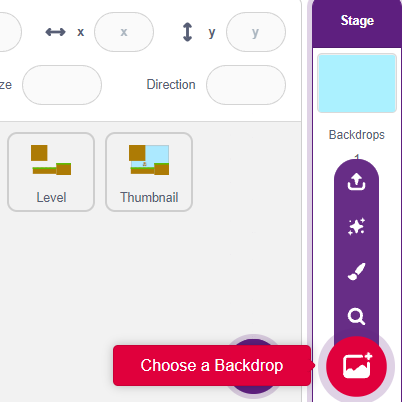
Figure 3: Designing a backdrop for your game
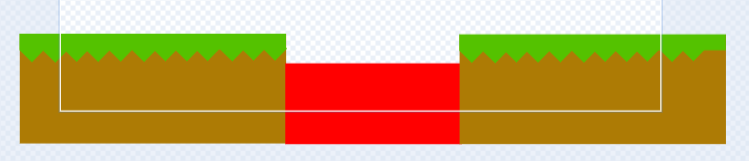
In Scratch platformer games, a hitbox is an invisible area around a sprite (typically the player or an object) that detects collisions or interactions with other sprites or the environment. The hitbox defines the boundaries of where a sprite can be “hit” or touch other elements in the game, such as platforms, enemies, or obstacles.
The hitbox helps manage collisions more accurately, especially in platformers, where precise movement and interaction with the environment are essential. Instead of using the entire sprite’s costume (which might have irregular shapes), a hitbox usually consists of a rectangular or square boundary that simplifies collision detection. This makes movement, jumping, and other physics-related interactions smoother and more reliable.
In Scratch, hitboxes are often implemented by creating an additional, invisible sprite or by using specific parts of the player’s costume that determine when collisions occur (e.g., checking if the player is touching a platform). Developers may adjust the size and shape of the hitbox for more accurate or forgiving gameplay mechanics.

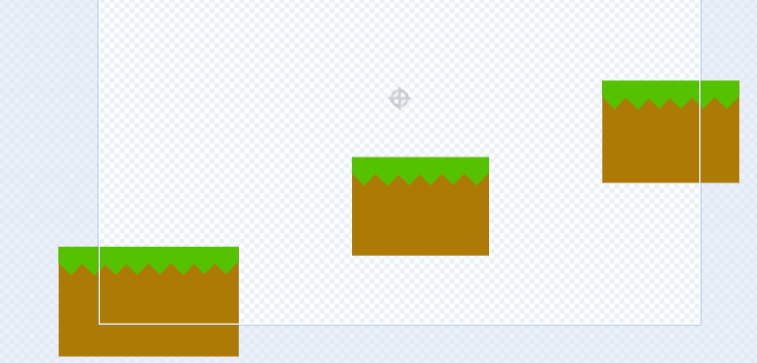
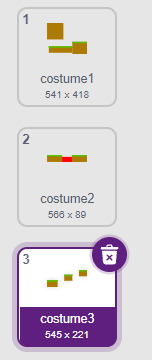
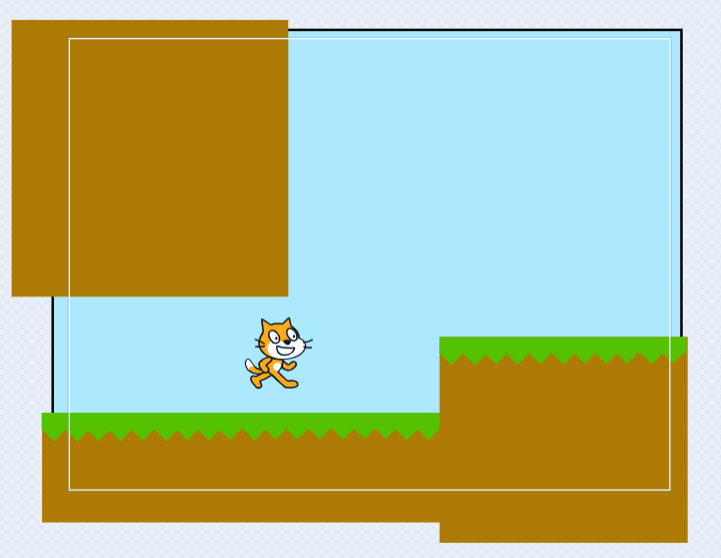
Figure 4: Adding platforms to your game
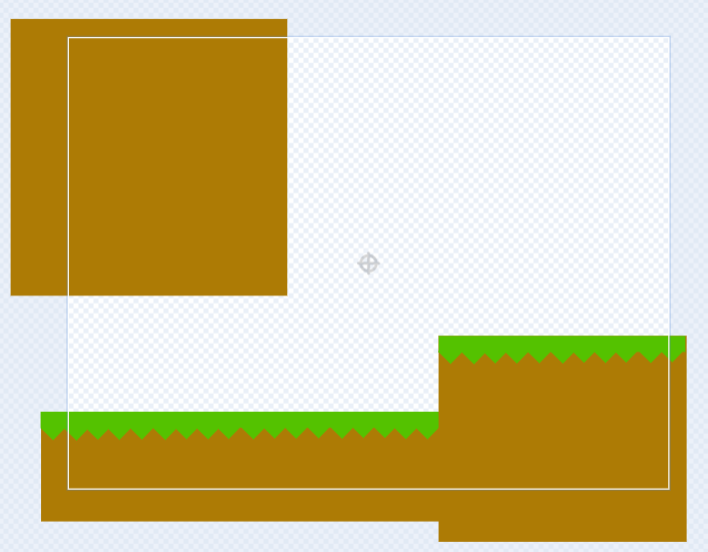
Add them as costumes:
In a Scratch-based platformer game, a thumbnail refers to the small preview image that represents the game on Scratch’s project page. It is the first visual element that users see when browsing or searching for projects, so it plays an important role in attracting players’ attention.
Typically, the thumbnail showcases a key aspect of the game, such as the main character, a level design, or a special feature that highlights the gameplay. Scratch creators can design the thumbnail using custom graphics, screenshots from the game, or visual elements that give users an idea of what the game is about.
In Scratch, you can set a thumbnail for your project by taking a screenshot of the game’s display area or creating a custom image that will represent the project when it is shared on the Scratch platform.
Fig 5: Add thumbnails
Now that we have our game elements in place, let’s bring our platformer to life with some basic coding!
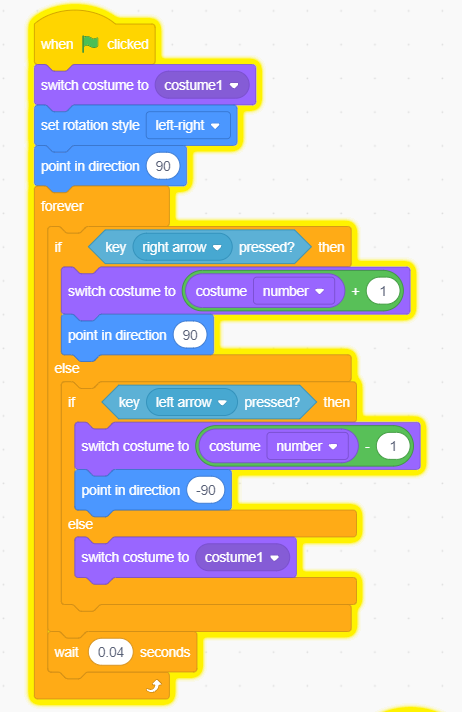
We’ll use the arrow keys to control our character’s movement. Here’s how to set it up:
Figure 5: Coding movement controls
To ensure our character stands on platforms instead of falling through them, we need to implement collision detection:
Figure 6: Adding collision detection
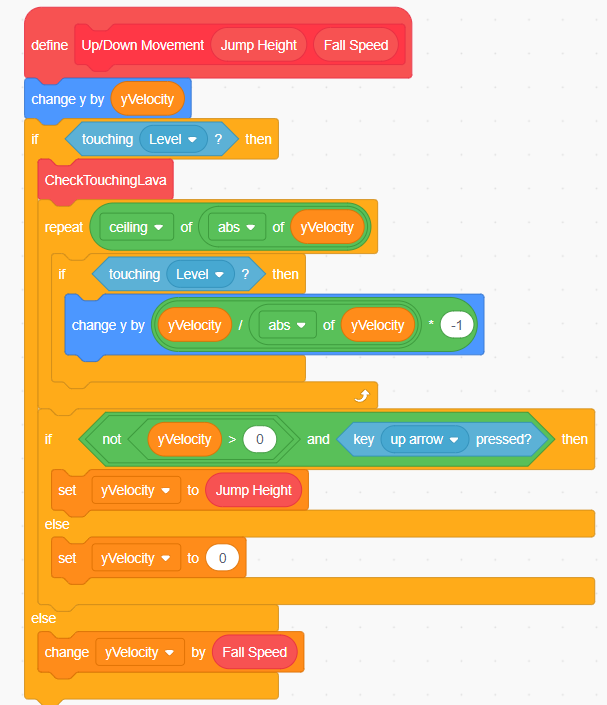
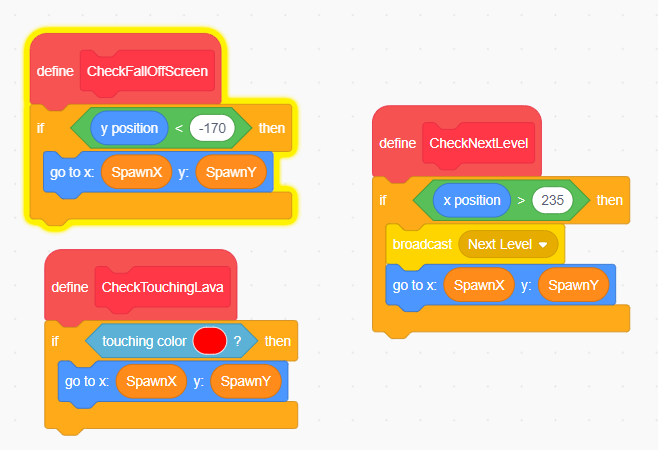
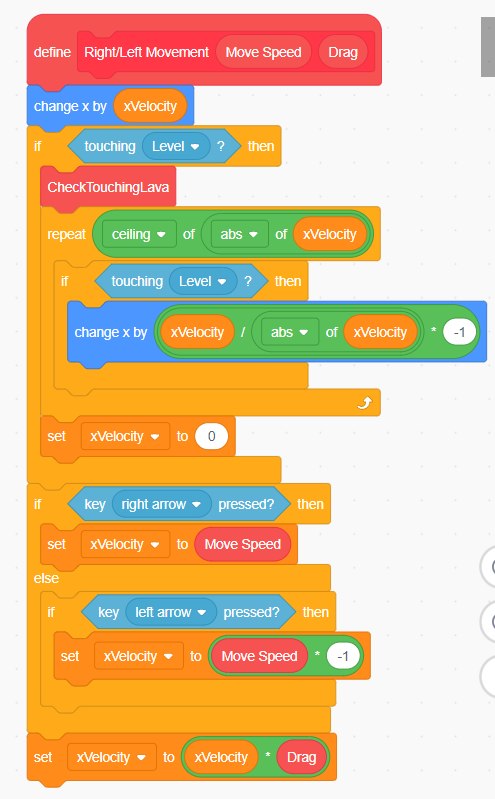
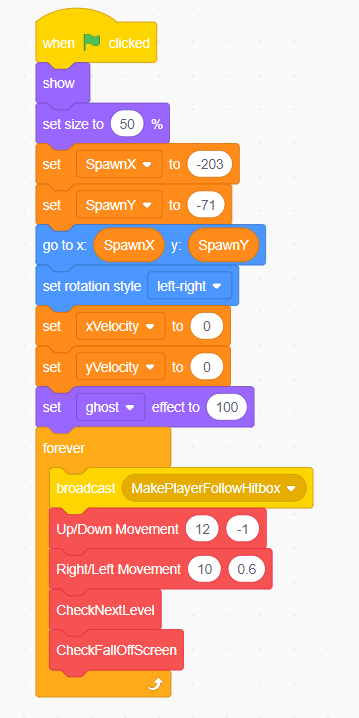
Figure 7: Level Changes
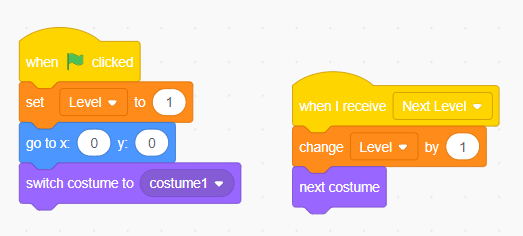
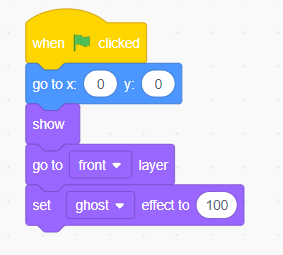
Figure 8: Effects for Thumbnail
Ready to take your platformer to the next level? Let’s add some advanced features!
Now it’s time to let your creativity shine! Here are some ideas to make your platformer unique:
Remember, the key to great game design is iteration. Keep refining and adding new features to make your game even more engaging!
Testing is crucial to ensure your game works as intended. Here are some tips:
If you find bugs, don’t worry! Debugging is a normal part of game development. Check your scripts carefully and make adjustments as needed.
Sharing Your Game
Once you’re happy with your game, it’s time to share it with the world!
Sharing your game allows other Scratchers to play, comment, and even remix your project. It’s a great way to get feedback and inspiration for future improvements.
Congratulations! You’ve learned how to make a platformer on Scratch. By following this guide, you’ve not only created a fun game but also learned important programming concepts like loops, conditionals, and event handling. These skills will serve you well as you continue your coding journey.Remember, game development is a creative process, and there’s always room for improvement and new ideas. Keep experimenting, learning, and most importantly, having fun with Scratch!
u003cstrongu003eMy character keeps falling through platforms. What should I do?u003c/strongu003e
Check your collision detection code. Make sure you’re using the correct color or sprite for the u0022touchingu0022 block.
u003cstrongu003eHow can I make my game more challenging?u003c/strongu003e
Try adding moving platforms, more obstacles, or trickier jumps. You can also increase the speed of enemies or reduce the time limit for each level.
u003cstrongu003eCan I add sound effects to my game?u003c/strongu003e
Absolutely! Use the u0022Soundu0022 blocks to add background music or effects for jumping, collecting items, or completing levels.
Happy coding, young game developers! Your next great idea could be just a few blocks away./
Want your child to go further? Explore ItsMyBot’s Little Coder — structured coding courses designed for kids!
