Are you ready to dive into the exciting world of game development? Creating a clicker game in Scratch is one of the most rewarding projects for beginners, combining simple mechanics with engaging gameplay that keeps players coming back for more. This comprehensive tutorial includes 38 detailed code screenshots that will guide you through every aspect of building your very own planetary clicker game.
In this tutorial, you’ll learn how to create an interactive clicker game where players click on a planet to earn points, purchase upgrades from a sophisticated shop system, and watch their virtual world grow. By the end of this guide, you’ll have a fully functional game and a solid understanding of advanced programming concepts in Scratch.
A clicker game, also known as an incremental game, is a genre where the primary mechanic involves clicking on objects to generate resources or points. These games typically feature:
Popular examples include Cookie Clicker, Adventure Capitalist, and Clicker Heroes. The beauty of clicker games lies in their simplicity – they’re easy to understand but surprisingly addictive due to their satisfying progression systems.
Before we begin coding, make sure you have access to Scratch. You can use Scratch online or download the offline version. For this project, we’ll be creating a planetary-themed clicker game where players click on a growing planet to earn resources.
What You’ll Need:

This screenshot shows the final game interface with all elements working together:
Our clicker game will feature several key components:
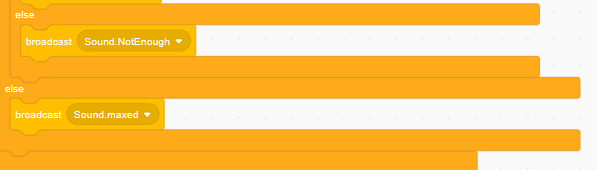
The sound system responds to multiple game events:
This comprehensive audio system includes:

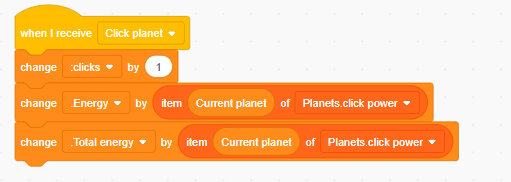
This code demonstrates the core clicking mechanics:
This system handles:

Advanced validation system including:
Advanced resource management including:
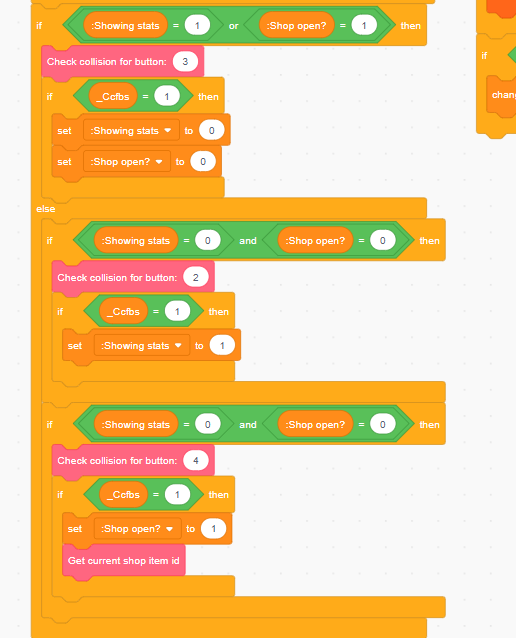
Comprehensive shop state management:
Simple but effective click response:

This creates immediate visual feedback with ghost effects when players interact with game elements.

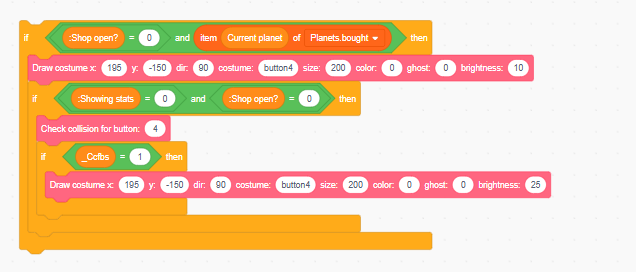
The shop system includes sophisticated rendering:
Simple but effective size management:

This creates immediate visual feedback when players click the planet, making each interaction satisfying and obvious.
This system manages sound broadcasting with:

Sophisticated item management system:

Professional interface controls:

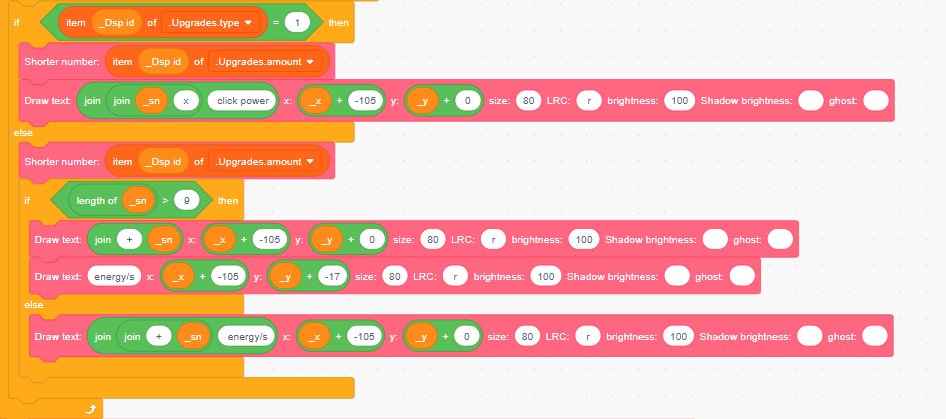
Advanced layout system featuring:

Professional number formatting includes:

Professional visual pipeline:

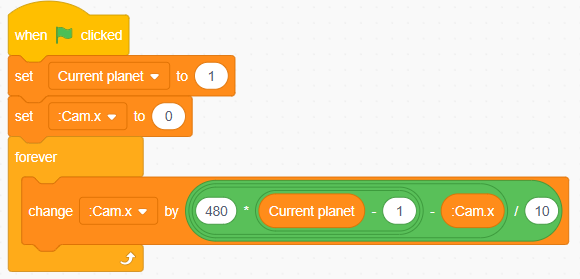
Advanced camera system:
Advanced upgrade categorization:
Intuitive navigation system:

Efficient text cleanup system:

This ensures smooth performance by cleaning up unused text elements.

Professional resource management including complex mathematical operations and state management with multiple conditional statements and advanced variable coordination.

Professional text system featuring:

Complete statistics tracking:
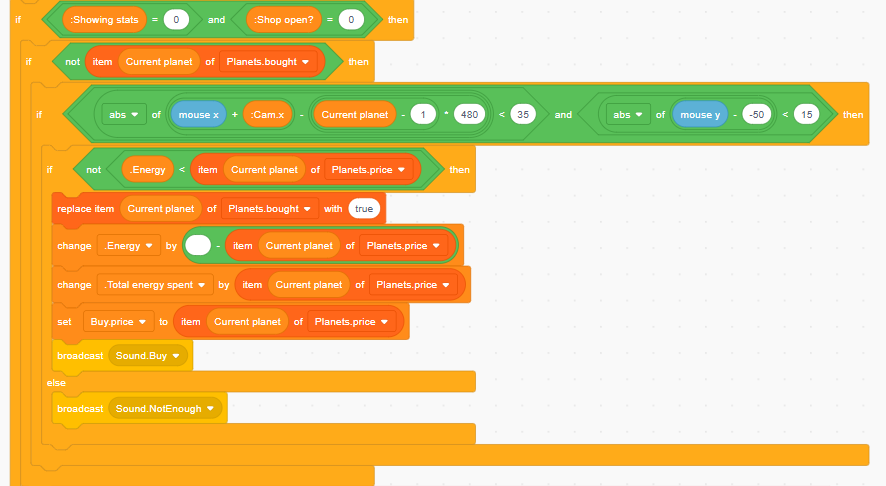
Advanced purchase system featuring:

Advanced navigation includes:
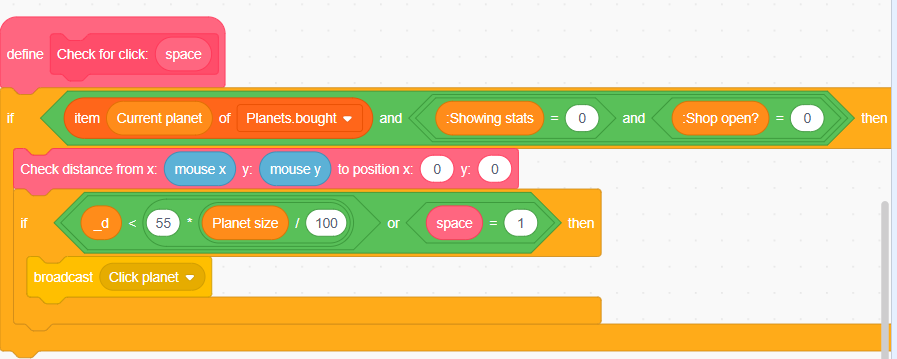
Advanced input handling:
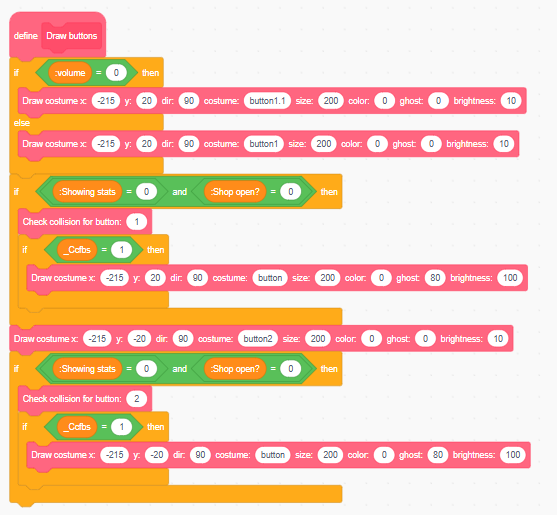
Professional button system:
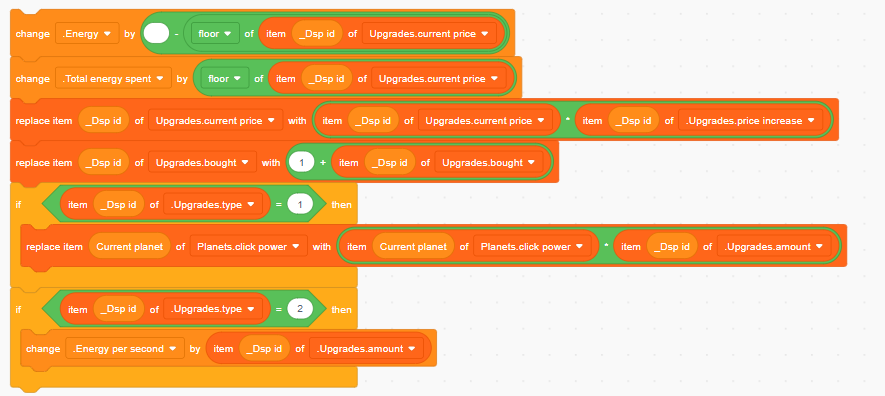
Sophisticated upgrade system:

Advanced click processing:
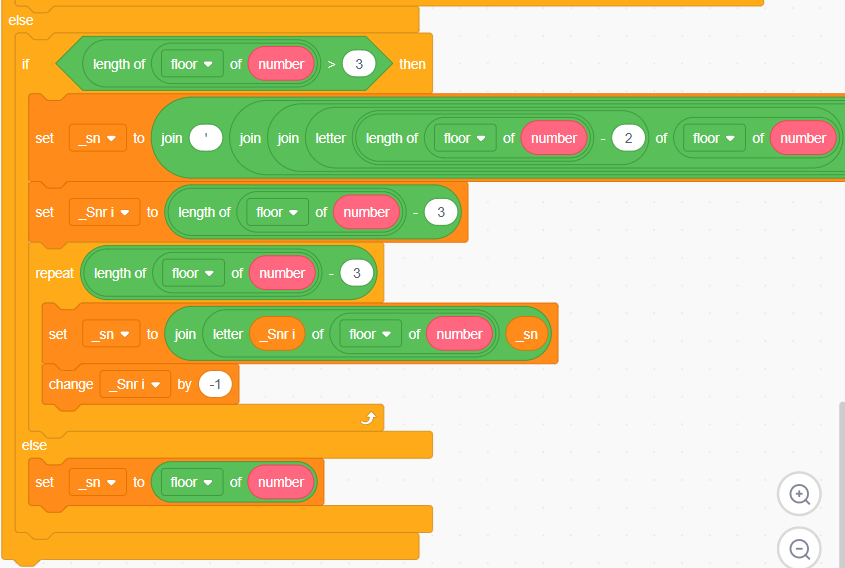
Additional formatting features:

Extended camera features:

Mathematical precision system:

Complete startup sequence:

Comprehensive input system:

Professional button interaction:

Professional rendering system:

Advanced button management:
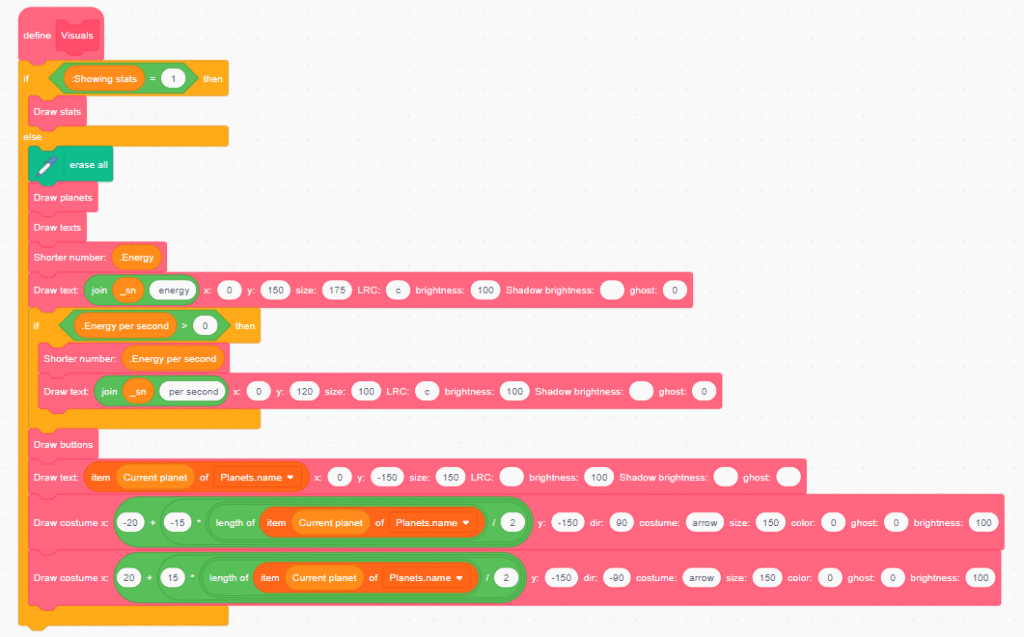
Master visual coordinator:
When building your clicker game, keep these optimization tips in mind:
Problem: Shop doesn’t respond to clicks Solution: Check collision detection boundaries and ensure shop state variables are properly managed.
Problem: Planet doesn’t grow smoothly Solution: Verify camera calculations and ensure size changes are properly coordinated.
Problem: Numbers display incorrectly Solution: Review number formatting logic and ensure proper string manipulation.
This clicker game project introduces several important programming concepts:
To continue your Scratch journey, consider exploring these related topics:
Congratulations! You’ve just learned how to create a comprehensive clicker game in Scratch using 38 detailed code examples. This project demonstrates that even simple game mechanics can create engaging and addictive experiences when implemented with professional techniques.
Your planetary clicker game now features:
Key Takeaways from This Project:
The beauty of Scratch lies in its accessibility – you’ve just created a complete professional-quality game using visual programming blocks! This foundation prepares you for more advanced game development concepts and potentially other programming languages.
Ready for Your Next Challenge? Now that you’ve mastered advanced clicker games, why not try creating other complex projects? Consider building a maze game in Scratch or exploring how to make a Mario game on Scratch. Each project will teach you new programming concepts and advanced game design principles.
Remember, the best way to improve your programming skills is through practice and experimentation. Don’t be afraid to modify your clicker game, add new features, or completely reimagine the concept with your own creative ideas. Happy coding!
Want your child to go further? Explore ItsMyBot’s Little Coder — structured coding courses designed for kids!
