You’re watching your child scroll through another video, and you wonder: What if that screen time could build actual skills?
What if instead of just consuming content, they could create something amazing? Something that teaches them coding, AI, and robotics while keeping them engaged for hours.
That’s exactly what PictoBlox projects for kids offer. Your child isn’t just playing—they’re building real technical skills that matter.
The Growing Challenge
Parents today face a unique problem. Kids spend an average of 7 hours daily on screens, yet most of that time doesn’t teach them anything valuable.
You want your child to learn technology skills that prepare them for the future. But traditional coding platforms feel too complex, too text-heavy, or just plain boring for young learners ages 5-15.
The Promise
In this guide, you’ll discover exactly how PictoBlox projects transform passive screen time into active skill-building time. We’ll walk through what makes PictoBlox different, share 10 hands-on projects your child can start today, and show you the proven framework that makes learning coding actually fun.
By the end, you’ll have a clear plan to help your child build creativity, confidence, and future-ready skills.
Find Your Next Project
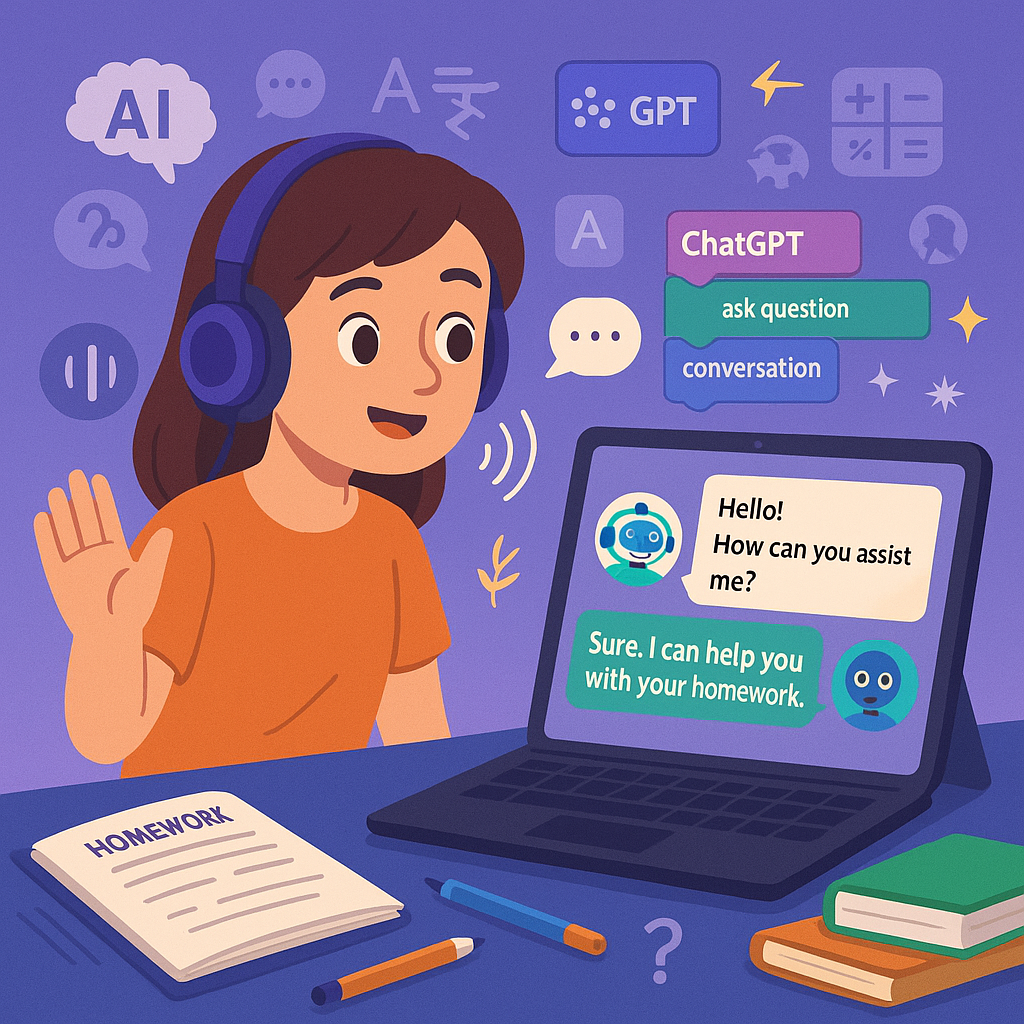
Which PictoBlox Project Should You Try?
Compare these five ideas by difficulty, equipment, and the skills
you’ll practise. If you’re new to coding, start with an Animated
Story and work your way up to AI and robotics projects.
Project
Difficulty
Hardware Needed?
Main Skill
🎬Animated Story
Beginner
No
Animation and sequencing
🎨
AI Drawing Guess Game
Intermediate
No
AI and image recognition
✋
Gesture-Controlled Game
Intermediate
Camera may be required
Gesture recognition
🏠
Smart Home Simulator
Beginner–Intermediate
Not for simulation
Automation logic
🤖
Maze Navigation Robot
Advanced
Compatible robot and sensors
Robotics and logic
💡 Tip: Swipe horizontally to see all columns.
💡Before you start:
These difficulty levels are suggested guides. Exact requirements
can vary depending on the project design, PictoBlox version,
available extensions, and the hardware you use.
10 Amazing PictoBlox Projects for Kids
Project 01 · AI & Coding
AI Gesture Recognition Game
Intermediate
Recommended Age8–12 years
Estimated Time45–60 minutes
What You NeedPictoBlox and a compatible gesture-recognition setup
🎮 What Will You Build?
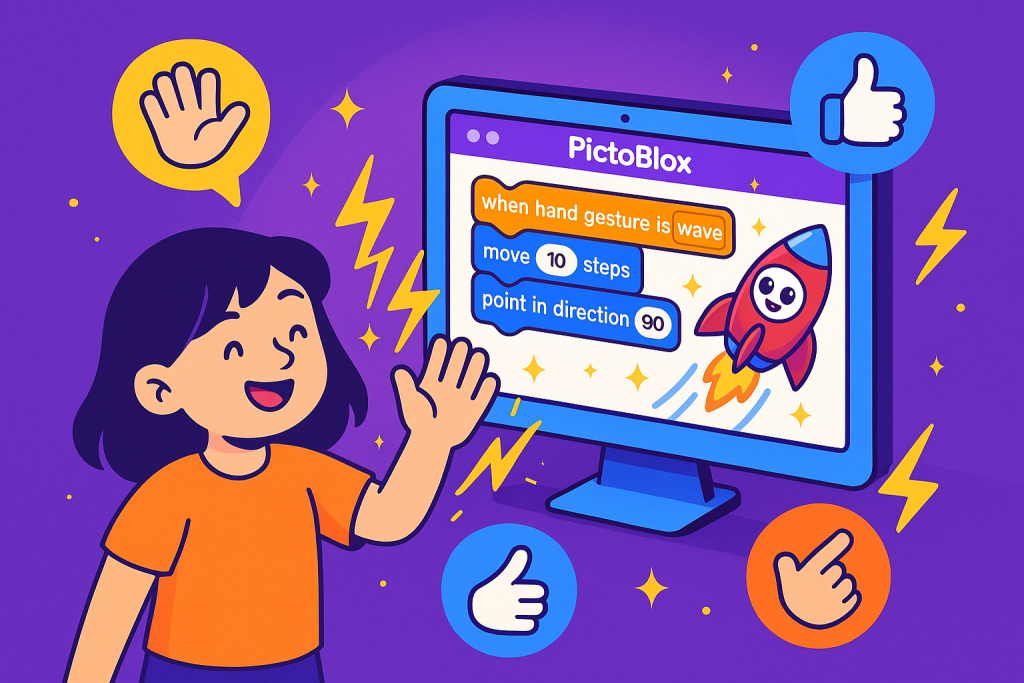
Create an interactive game where a character responds to hand
gestures. Depending on the gestures supported by your PictoBlox
setup, players can make a character jump, dance, or move around
the screen.
🧠 What Will Kids Learn?
Kids will explore how AI-based gesture recognition works with
block-based programming. They can practise using events,
conditions, and movement commands to turn recognised gestures
into game actions.
AI FundamentalsEvent-Based CodingConditional LogicGame Design
⚙️ How Does It Work?
The project uses a supported gesture-recognition feature to
identify a player’s hand movement. The code checks the
recognised gesture and runs the matching action—for example,
making a character jump or move in a direction.
🚀
Example Project Idea
Build a space-explorer game where the player controls a rocket
using recognised hand gestures. One gesture could move the
rocket, while another triggers a special action. Add obstacles
and points to make the game more challenging.
✨
Why Kids Love This Project
It combines movement, creativity, and game design. Kids can
experiment with different controls and see how their code
changes the way the game responds.
Project 02 · AI & Animation
Face Detection Virtual Pet
Beginner-Friendly
Recommended Age7–11 years
Estimated Time30–45 minutes
What You NeedPictoBlox, a virtual pet, and a compatible camera setup
🐶 What Will You Build?
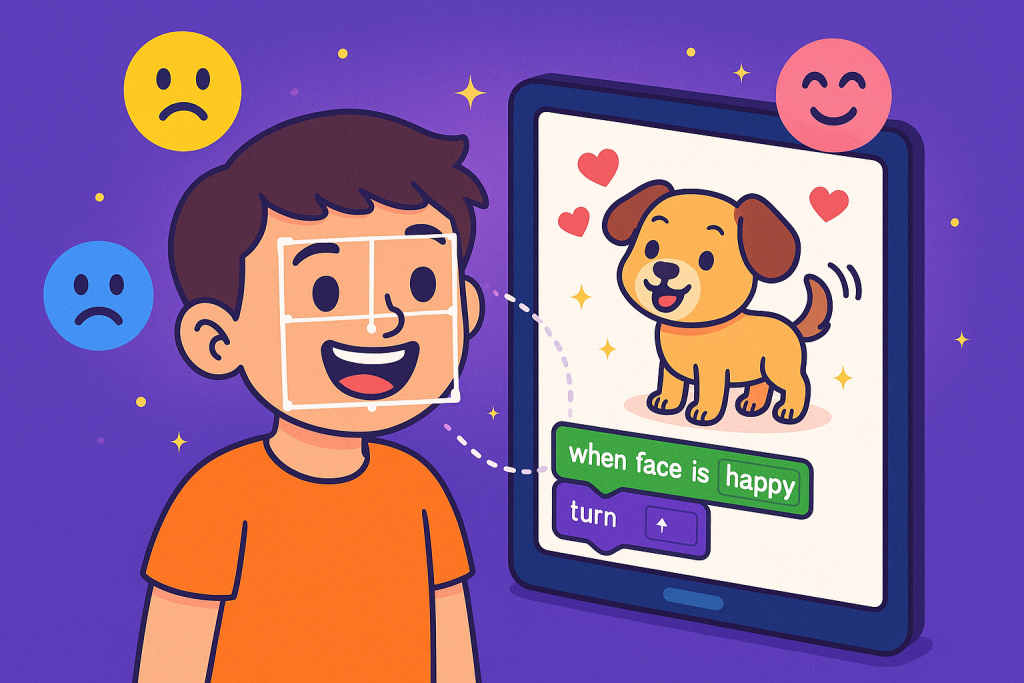
Create a digital pet that reacts to a person’s face or
supported facial cues. Your virtual companion can display
different animations and expressions, making the experience
feel more interactive and playful.
🧠 What Will Kids Learn?
Kids can explore how face detection connects with
block-based programming. They will practise using events,
conditional statements, and animations to make a character
respond to recognised input.
AI FundamentalsFace DetectionAnimationConditional Logic
⚙️ How Does It Work?
The project uses a supported face-detection feature to identify
a face in the camera input. Your code can then check the
available detection results and trigger a matching animation.
For example, the pet might wave when a face is detected or
change its expression when the player activates a particular
supported interaction.
🐾
Example Project Idea
Design a playful puppy that reacts when someone appears in
front of the camera. Make it wag its tail when a face is
detected, play a happy animation when the player interacts
with it, and switch to a resting animation after a short
period of inactivity.
✨
Why Kids Love This Project
Children can create a digital companion with its own
personality. Combining AI concepts with animation gives
them a fun way to experiment with interactive storytelling.
Privacy tip:
If the project uses a camera, get a parent or teacher’s
permission and check the software’s camera and data settings
before starting.
Project 03 · IoT & Automation
Smart Home Simulator
Intermediate
Recommended Age10–14 years
Estimated Time60–90 minutes
What You NeedPictoBlox and a computer; hardware is optional for a simulation
🏠 What Will You Build?
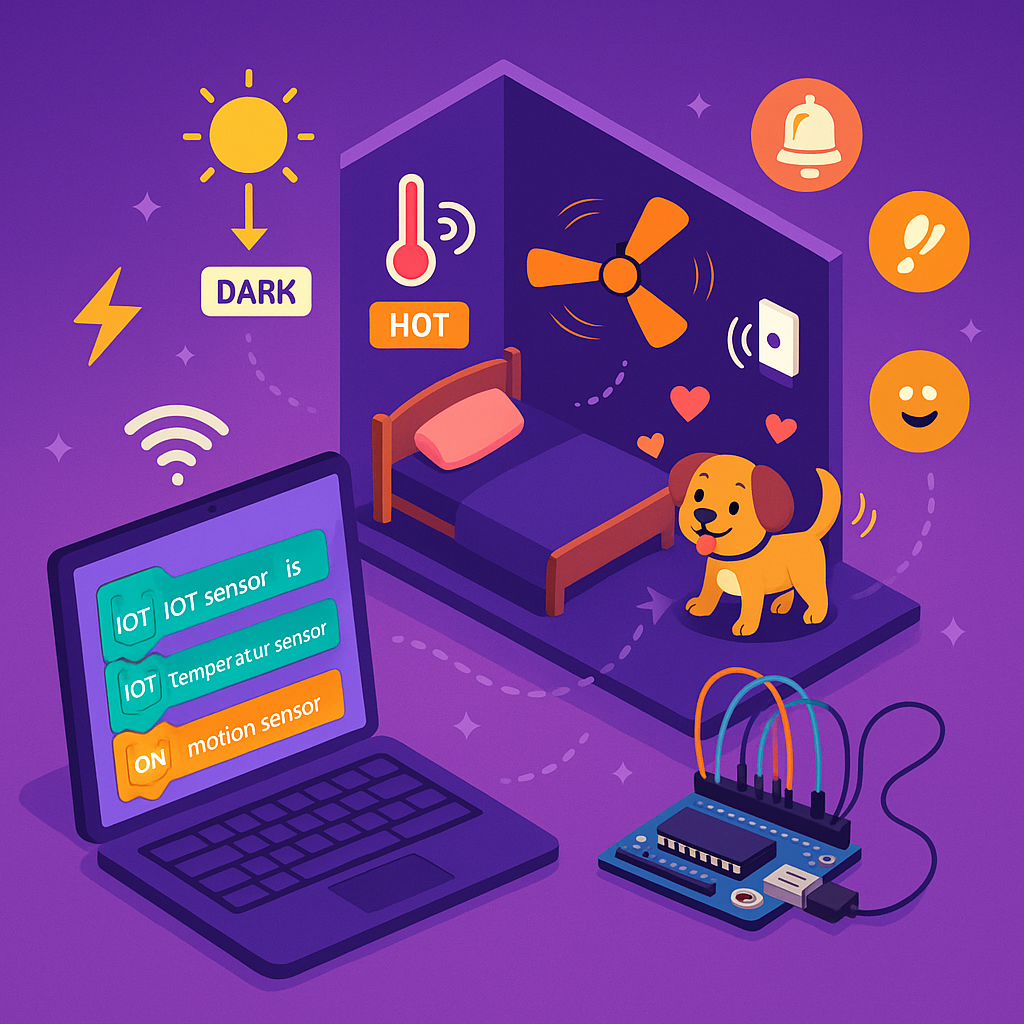
Design a virtual smart home where lights, fans, and alarms
respond to changing conditions. Use programmed inputs or
simulated sensor readings to explore how automated systems
make decisions without needing physical smart-home devices.
🧠 What Will Kids Learn?
Kids will practise conditional logic, variables, and
event-driven programming while learning the basics of
sensors, automation, and the Internet of Things (IoT).
They can also explore how input values trigger different
actions in a simulated environment.
Create rules that connect an input to an action. For example,
when a simulated brightness value falls below a chosen
threshold, the virtual lights switch on. A temperature value
can control a simulated fan, while a door-status input can
trigger an alert. Compatible physical sensors can be added
later if you want to extend the project.
💡
Example Project Idea
Build a bedroom simulator with automatic lighting and
temperature controls. Set the virtual lights to turn on
when the room becomes dark and the fan to activate when
the temperature rises above your chosen threshold. Add
an alert that activates when a virtual door opens.
✨
Why Kids Love This Project
It shows how everyday technology can respond automatically
to its surroundings. Kids can experiment with their own
rules and see how small changes in inputs affect an entire
simulated home.
Project 04 · AI & Storytelling
Voice-Controlled Storytelling
Beginner-Friendly
Recommended Age6–10 years
Estimated Time40–50 minutes
What You NeedPictoBlox, a story scene, and compatible microphone input
📖 What Will You Build?
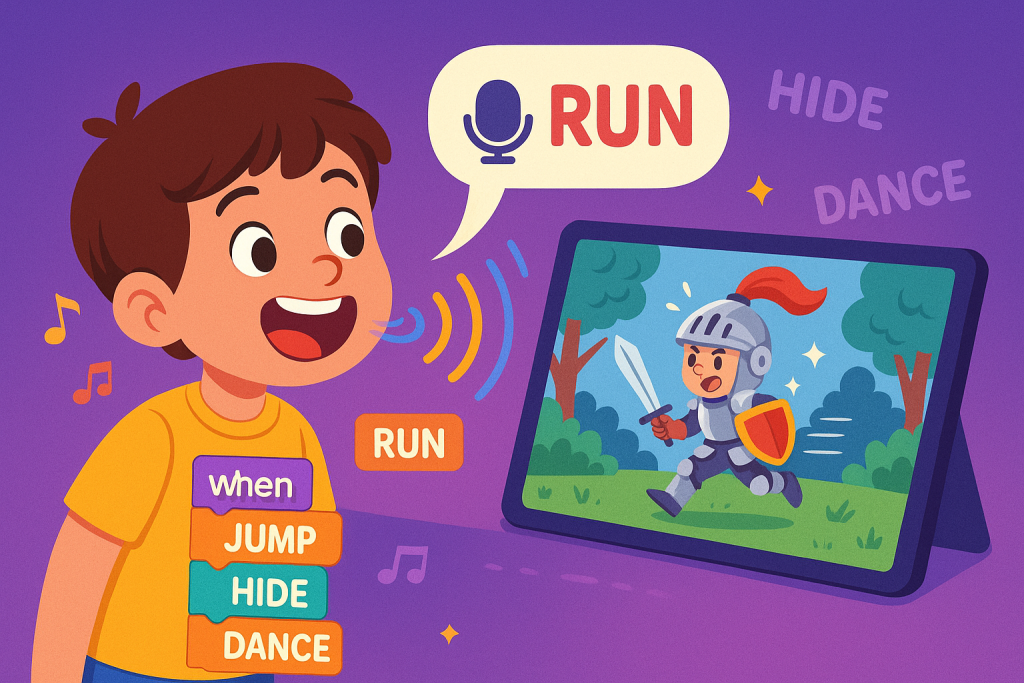
Create an animated, interactive story where spoken commands
influence what happens next. Characters can move, hide, or
reveal new scenes when the program recognises a supported
voice command, turning a simple animation into an interactive
storytelling experience.
🧠 What Will Kids Learn?
Kids can explore speech recognition, event-based programming,
animation, and story structure. They’ll practise connecting
recognised commands to actions and organising a story into
scenes with different outcomes.
Set up a story with characters, backgrounds, and actions.
When the supported speech-recognition feature detects a
configured command, your code triggers the matching event.
For example, saying a command such as “run” could make the
hero sprint, while “hide” could move the character behind
an object.
🎙️ Try These Voice Commands
Start with a few simple commands and assign each one a
different action in your story.
🏃
“Run”
Make the hero sprint
🫣
“Hide”
Move behind an object
🚪
“Next”
Switch to another scene
✨
Example Project Idea
Create an adventure in which a hero explores a mysterious
forest. The player can say “run” to escape an obstacle,
“hide” to avoid a creature, or “next” to move to another
scene. Add sound effects and different endings to make
the story more engaging.
💜
Why Kids Love This Project
Kids get to become both the storyteller and the director.
Speaking to their creation and watching the story respond
makes coding feel interactive, personal, and creative.
Project 05 · AI & Creativity
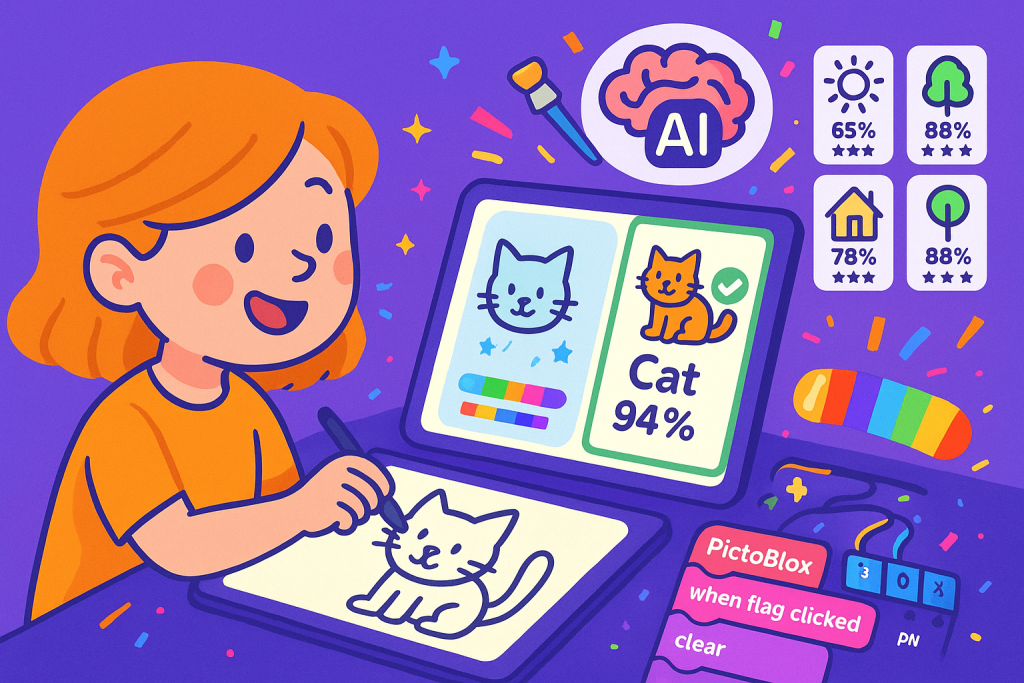
AI Drawing Guess Game
Intermediate
Recommended Age8–13 years
Estimated Time45–60 minutes
What You NeedPictoBlox, a drawing canvas, and a compatible image-recognition setup
🎨 What Will You Build?
Create a drawing game where players sketch simple objects
and an AI model tries to identify what they have drawn.
Challenge friends and family to draw objects such as a sun,
house, or cat, then compare their drawings with the model’s
predictions.
🧠 What Will Kids Learn?
Kids can explore image recognition, machine learning,
and creative problem-solving. They will learn that AI
predictions depend on the examples a model was trained
on—and that unclear drawings can lead to incorrect guesses.
Players draw an object on the screen, and the program sends
the drawing to a compatible image-recognition model. The model
returns its prediction, which the game displays on screen.
You can award points when the prediction matches the intended
object. The exact setup depends on the model and PictoBlox
features you use.
✏️ What Can You Draw?
Start with simple objects that are easy to recognise.
Use the examples below as inspiration for your first round.
☀️Sun
Draw a circle and rays
🏠House
Add a roof and windows
🐱Cat
Sketch ears and whiskers
🎯
Example Project Idea
Turn the game into a family drawing challenge. Each player
gets 30 seconds to draw a selected object. The AI makes a
guess, and the game awards a point when the guess is correct.
Keep score over several rounds and see which drawings are
easiest for the model to recognise.
✨
Why Kids Love This Project
It combines art, friendly competition, and technology.
Kids can experiment with different drawing styles while
discovering how machine learning recognises patterns
and why AI doesn’t always get the answer right.
Project 06 · AI & Music
Gesture Music Composer
Intermediate
Recommended Age9–14 years
Estimated Time50–70 minutes
What You NeedPictoBlox, a compatible gesture input, and sound or music blocks
🎵 What Will You Build?
Turn hand movements into music with an interactive
gesture-controlled music composer. Assign different notes
or sounds to supported gestures, then move your hands to
create melodies, experiment with rhythms, and perform
like a virtual orchestra conductor.
🧠 What Will Kids Learn?
Kids will explore the connection between movement, sound,
and code. They can practise event-based programming,
sequencing, pattern recognition concepts, and basic music
composition while experimenting with how different inputs
produce different sounds.
AI ConceptsGesture RecognitionMusic CompositionCreative Coding
⚙️ How Does It Work?
Configure the project so that recognised gestures trigger
particular musical notes or sounds. When the system detects
a supported hand position or movement, the corresponding
sound plays. Combine multiple gestures in sequence to build
a melody, and add timing controls to experiment with rhythm.
👋 Try These Gesture Ideas
Start with a few simple gesture-to-sound mappings. The
specific gestures depend on the recognition feature
supported by your PictoBlox setup.
✋Open Hand
Play a high note
✊Closed Fist
Play a low note
☝️Point Up
Change the melody
🎼
Example Project Idea
Compose a short tune by mapping a few supported hand
gestures to musical notes. Practise performing the notes
in sequence, then add a second melody or a repeating rhythm.
Challenge a friend to recreate your tune using the same
gesture controls.
✨
Why Kids Love This Project
It lets kids experiment with music without needing to
play a traditional instrument. Every movement can become
part of a performance, combining creativity, technology,
and the excitement of making something uniquely their own.
Project 07 · Robotics & Automation
Maze Navigation Robot
Advanced
Recommended Age10–15 years
Estimated Time90–120 minutes
What You NeedCompatible robot, controller, and proximity sensors
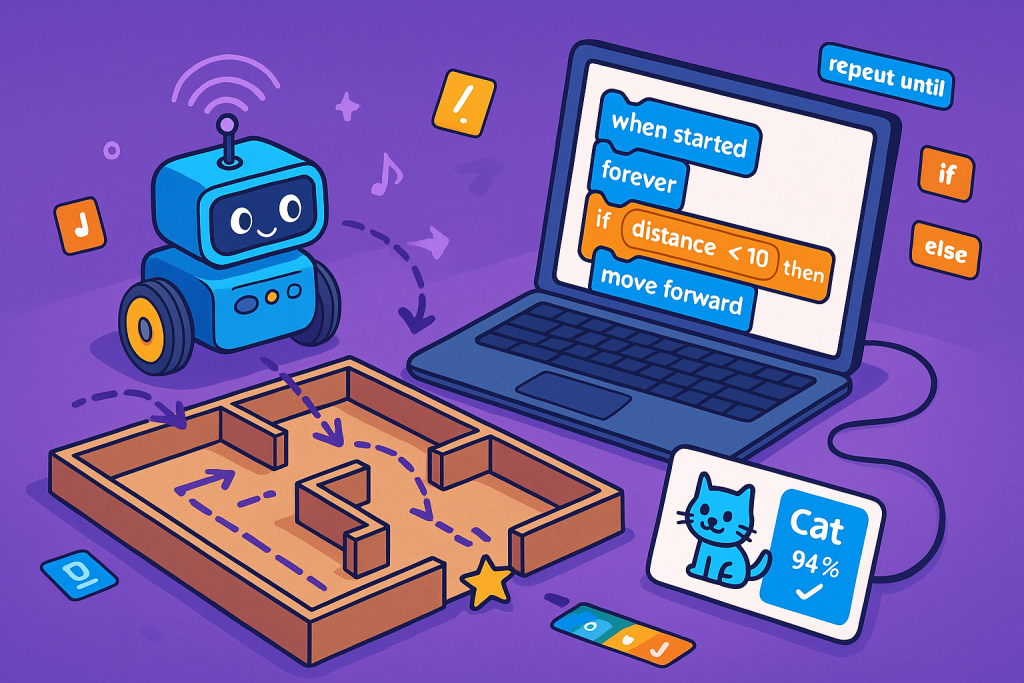
🤖 What Will You Build?
Build and program a robot that can navigate a maze with
minimal human intervention. Using proximity sensors to
detect nearby walls and obstacles, the robot follows
programmed rules to move forward, turn, and find a route
through the maze.
🧠 What Will Kids Learn?
Kids will explore robotics, sensor inputs, motor control,
loops, and conditional logic. They’ll learn how robots
use sensor readings to make movement decisions, test
their programs, and improve navigation when the robot
gets stuck or takes a wrong turn.
Program the robot to read its proximity sensors and
respond to nearby obstacles. For example, it can move
forward when the path is clear, stop when a wall is
detected, and turn according to a set of navigation
rules. Repeat this decision-making process in a loop
until the robot reaches the exit or needs help.
🧭 The Robot’s Navigation Process
Break the challenge into three stages before testing
the robot in your maze.
📡
1. Detect
Read sensor values to check for nearby walls.
↪️
2. Decide
Use programmed rules to choose a direction.
🏁
3. Navigate
Control the motors and repeat until the goal is reached.
🏆
Example Project Idea
Build a maze using cardboard boxes and mark a clear
starting point and exit. Program a compatible robot,
such as Quarky with the required sensors and setup, to
detect walls and navigate the course. Test different
routes, adjust turning behaviour, and see whether the
robot can reach the exit consistently.
✨
Why Kids Love This Project
Watching a real robot make its own movement decisions
brings coding to life. Every successful turn feels
rewarding, while unexpected mistakes give kids a
practical reason to debug, experiment, and improve
their programs.
🔗
Want to Explore More Robotics Projects?
Learn how another sensor-based robot works in our guide
on how to make a line follower robot.
It’s a useful next project for exploring sensor inputs
and autonomous movement.
Project 08 · AI & Fitness
Pose Detection Yoga Checker
Intermediate
Recommended Age11–15 years
Estimated Time60–75 minutes
What You NeedPictoBlox, a compatible camera, and pose-detection support
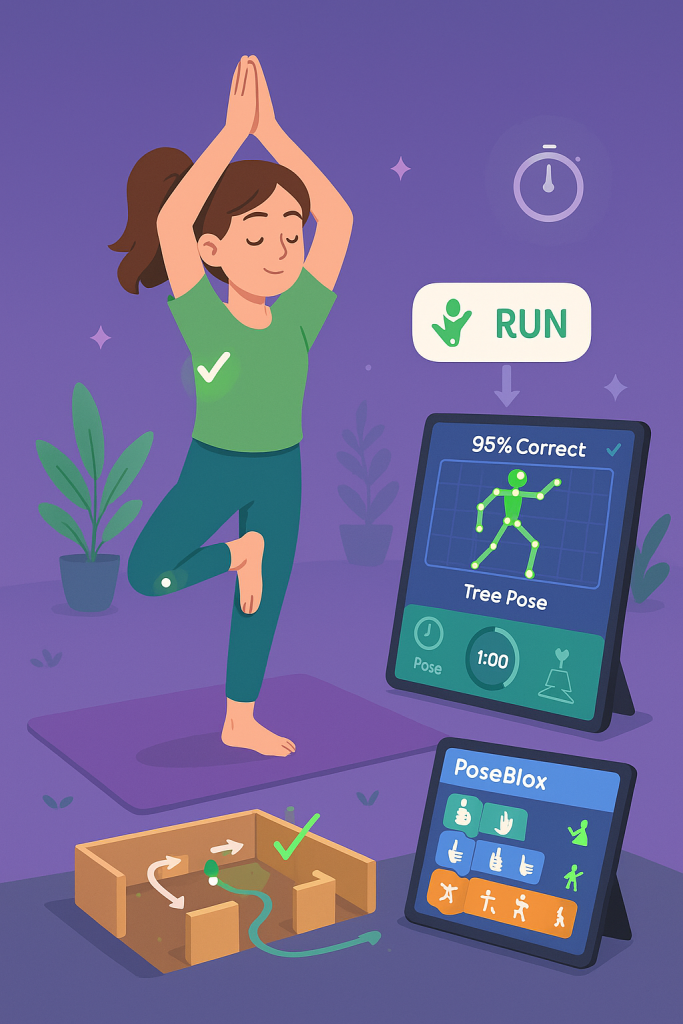
🧘 What Will You Build?
Create an interactive yoga project that uses AI pose
detection to track body positions on screen. The program
can identify supported poses, display visual feedback,
and help users compare their position with a target pose.
Turn practice into a fun, technology-powered activity.
🧠 What Will Kids Learn?
Kids will explore pose estimation, body tracking, and
conditional programming. They can learn how AI identifies
key points on a person’s body and how software uses those
points to compare positions against simple programmed
rules.
A compatible pose-detection model analyses the camera
image and estimates body landmarks, such as shoulders,
elbows, hips, and knees. Your program can compare selected
landmark positions or angles with simple reference rules
and display feedback such as “Try raising your arm” or
“Pose detected!” The accuracy depends on the model,
camera position, lighting, and how the rules are designed.
🌿 Yoga Poses to Explore
Start with a few recognisable poses and design simple
visual prompts to guide the practice.
🌳Tree Pose
Explore balance and body positioning.
🏹Warrior Pose
Compare arm and leg positions.
🐕Downward Dog
Explore the position of hands, hips, and legs.
🎯
Example Project Idea
Build a virtual yoga trainer that displays a target pose
and checks selected body landmarks against simple reference
rules. When the user’s estimated position matches the
programmed conditions, show a success message or award a
point. Add more poses as you improve the project.
✨
Why Kids Love This Project
It combines movement, creativity, and AI in a hands-on
challenge. Kids can experiment with pose detection,
build interactive feedback, and make physical activity
feel more like a game.
Keep it safe:
Treat feedback as a coding demonstration, not a medical
assessment or a guarantee that a pose is being performed
correctly. Practise in a clear space, avoid painful movements,
and ask a qualified instructor for guidance when needed.
Project 09 · IoT & Environment
Automated Plant Watering System
Intermediate–Advanced
Recommended Age12–15 years
Estimated Time90–120 minutes
What You NeedCompatible controller, soil moisture sensor, and optional water pump
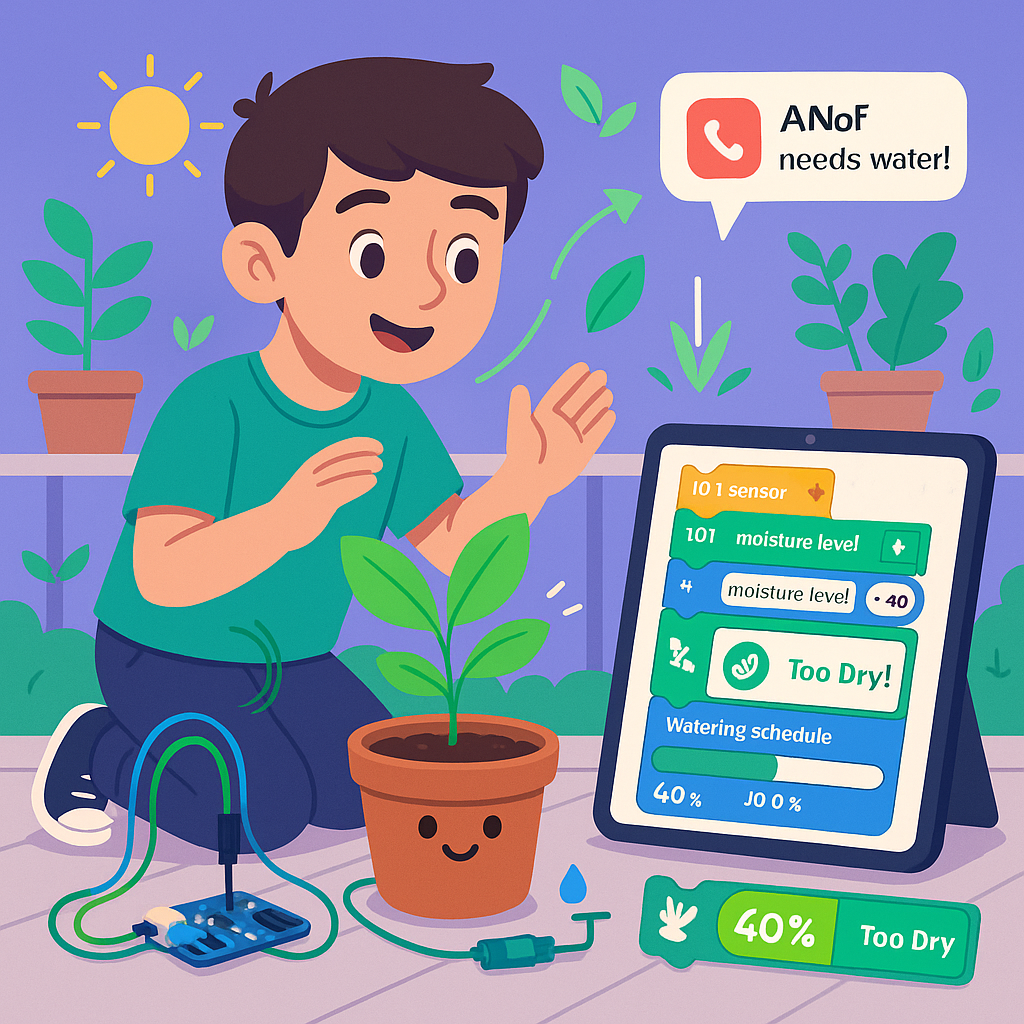
🌱 What Will You Build?
Build a smart plant watering system that checks soil
moisture and responds when a plant needs water. With a
compatible controller and sensor, your program can turn
a small water pump on when the soil becomes too dry
and stop it when the target moisture level is reached.
🧠 What Will Kids Learn?
Kids will explore environmental monitoring, sensor
readings, automation, and conditional programming.
They’ll learn how software can respond to real-world
measurements and how simple rules can help automate
everyday tasks.
The moisture sensor measures the soil’s moisture level
and sends a reading to the controller. Your program
compares that reading with a chosen threshold. If the
soil is too dry, it activates a compatible pump for a
limited time. The system can then check the soil again
before deciding whether more watering is needed.
💧 How the Smart Watering System Works
Divide the project into three basic stages to make
the programming easier to understand and test.
📊
1. Measure
Read the soil moisture sensor and check its value.
🧠
2. Decide
Compare the reading with the moisture threshold.
🚿
3. Water
Activate the pump safely when watering is needed.
🏆
Example Project Idea
Create a self-watering system for a small home garden.
Program it to check the moisture level at regular
intervals and activate a pump briefly when the soil
becomes too dry. As an optional extension, add a water
reservoir level sensor or a compatible Wi-Fi module
to send low-water notifications.
✨
Why Kids Love This Project
It solves a real-world problem with code. Kids can
watch sensors and automation work together to care
for a living plant, while discovering how technology
can support gardening and responsible water use.
Hardware safety:
Use a low-voltage pump and a compatible driver or relay.
Never power a pump directly from a controller pin unless
the hardware documentation explicitly supports it. Keep
water away from exposed electronics and disconnect power
before changing wiring.
Project 10 · Generative AI
ChatGPT-Powered Virtual Assistant
Advanced
Recommended Age12–15 years
Estimated Time75–90 minutes
What You NeedPictoBlox, compatible AI integration, and optional microphone
🤖 What Will You Build?
Create an interactive virtual assistant that can respond
to questions, explain concepts, translate text, and play
word games. Use PictoBlox’s supported ChatGPT integration
to connect your block-based program to a conversational
AI model. With compatible speech features, you can also
experiment with voice-based interaction.
🧠 What Will Kids Learn?
Kids will explore how applications connect to AI models,
how natural language processing supports conversations,
and how programs send prompts and display generated
responses. They’ll also practise designing instructions,
handling user input, and building a useful interactive
application.
Generative AINatural Language ProcessingAI IntegrationPrompt DesignBlock-Based Coding
⚙️ How Does It Work?
The user enters a question or gives a supported voice
command. The project passes the input to the configured
AI integration, receives a response, and displays it
on screen or reads it aloud if speech output is available.
You can add conditional blocks to route different requests
to different features, such as translation, study help,
or word games.
💬 What Can Your Assistant Do?
Start with one feature and add more as your program
becomes more advanced.
📚Homework Helper
Ask for clear explanations of science concepts,
maths methods, or unfamiliar words.
🌐Language Translator
Experiment with translating short phrases between
Hindi, English, and other supported languages.
🔬Science Explorer
Generate age-appropriate facts and follow-up
questions about the natural world.
🎮Word Game Host
Create riddles, vocabulary challenges, or
question-and-answer games.
🏆
Example Project Idea
Build a homework helper that lets students ask a question,
choose a topic, and receive a simple explanation. Add
an optional translation feature and a science-fact mode.
Include a clear reset button so users can start a new
conversation or activity.
✨
Why Kids Love This Project
Building a conversational assistant feels like creating
a personal version of a familiar smart assistant. Kids
can shape how it responds, experiment with AI prompts,
and turn a block-coding project into something interactive
and genuinely useful.
🔗
Explore More AI Projects
Looking for more ways to combine coding and artificial
intelligence? Browse our collection of
AI projects for kids
for more ideas and inspiration.
Use AI responsibly:
AI-generated responses can be inaccurate, so students
should verify important information with trusted sources.
Use an adult-approved setup, follow the platform’s age
requirements, and never enter passwords, private details,
or other sensitive information. Voice input, text-to-speech,
and ChatGPT access depend on the integration and features
available in your PictoBlox version.
Beginner’s Guide · Coding for Kids
Understanding PictoBlox: A Complete Framework
From colorful coding blocks to AI-powered projects and robotics,
PictoBlox gives young learners a hands-on way to explore how
technology works. Here’s what parents and students should know
before getting started.
🧩
What Is PictoBlox?
PictoBlox is an educational coding platform that helps learners
explore programming through block-based coding, with additional
capabilities for Python, artificial intelligence, machine
learning, and robotics. Instead of starting with complex
programming syntax, beginners can connect visual blocks to
create animations, games, interactive applications, and
supported hardware projects.
🧱
Code by Connecting Blocks
Drag and connect visual blocks to control characters, respond
to events, repeat actions, and make decisions. It’s similar
to assembling digital building blocks into a working program.
🚀
Progress Beyond the Basics
As skills grow, learners can explore more advanced programming,
AI features, and compatible robotics hardware. They can build
on earlier projects instead of learning everything at once.
💡
What PictoBlox Is—and Isn’t
✓
More Than a Game App
Games can be a starting point, but students can also
practise programming logic, build interactive projects,
and explore AI concepts.
✓
Not Just Virtual Projects
Learners can begin on screen and later explore physical
computing and robotics with supported hardware.
✓
Not Only for Advanced Students
Visual blocks make it easier for beginners to understand
programming concepts before tackling more complex tasks.
✓
No Hardware Needed to Start
Many beginner projects can be created on a computer
without purchasing a robot, sensors, or electronic parts.
👨👩👧👦
Who Is PictoBlox For?
🌈
Ages 4–7
Young Beginners
Start with age-appropriate visual activities, simple
sequences, and basic cause-and-effect concepts. Check
the available junior interface and device requirements.
🎮
Ages 8–12
Block Coding Explorers
Build games, animations, stories, and interactive
projects while learning loops, conditions, variables,
and event-based programming.
💻
Ages 12+
Python & Advanced Projects
Explore text-based programming, AI integrations, and
more advanced projects when the learner is ready and
the relevant features are supported.
🌱
All Experience Levels
Beginners & Families
No previous coding experience is necessary for many
introductory activities. Parents can use guided projects
to make screen time more creative and educational.
🎯
The Best Way to Get Started
Begin with a small project, such as an animated story or
simple game. Once the learner understands how blocks work,
introduce loops and conditions, then explore AI or robotics
if those features match their interests. Choose projects
based on the child’s readiness rather than age alone.
Choose Your Learning Path
The 3 Modes of PictoBlox Learning
PictoBlox supports different ways to learn programming, from
beginner-friendly visual blocks to text-based Python. The best
starting point depends on a child’s age, experience, and goals.
🌈
Mode 01
Junior Blocks
Suggested ages 4–7
An introductory path for young learners who are discovering
how instructions and sequences work through visual activities.
Simplified, visual coding activities
Colorful, beginner-friendly interface
Creativity and basic sequencing
Designed to reduce reliance on reading and typing
Suggested first-project time15–20 minutes
🧩
Mode 02
Block Coding
Suggested ages 8–12
A flexible visual programming path for creating games,
animations, interactive projects, and supported hardware builds.
Drag-and-drop programming blocks
Loops, variables, events, and conditions
AI and machine learning extensions where supported
Compatible Arduino and micro:bit projects
Explore supported AR and VR capabilities
Suggested first-game time30–45 minutes
💻
Mode 03
Python Mode
Suggested ages 12+
A text-based programming path for learners ready to move
beyond visual blocks and explore Python syntax and structure.
Write programs using Python syntax
Practise variables, loops, functions, and conditions
Develop debugging and problem-solving skills
Explore more advanced coding projects
Suggested transition periodSeveral weeks of practice
🚀
There is no single required path.
Learners can start with the approach that suits them and
progress at their own pace. Project times are estimates,
not guaranteed completion times.
📘
New to Block-Based Programming?
Learn the fundamentals with our guide on
how to use Scratch
.
Many concepts, including sequences, loops, and conditions,
also apply when learning PictoBlox.
Learning Beyond the Screen
Why PictoBlox Works: Proven Benefits
PictoBlox can make coding more engaging by giving children opportunities
to experiment, solve problems, build projects, and share what they create.
With the right guidance, these activities can support learning across
several important areas of development.
🖐️
Category 01
Physical Learning Benefits
Fine Motor Skills:
Dragging, dropping, and arranging coding blocks gives children
practice with mouse or touchscreen control.
Visual Processing:
Color-coded blocks help learners recognize patterns and
distinguish different types of instructions.
Active Engagement:
Building and testing projects encourages children to interact
with technology rather than only consume content.
More Meaningful Screen Time:
Coding turns screen use into an opportunity to create,
experiment, and solve challenges.
🧠
Category 02
Mental & Emotional Benefits
Problem-Solving Skills:
Children practise breaking larger challenges into smaller,
manageable steps.
Confidence Building:
Completing a game, animation, or interactive project can
give learners a sense of achievement.
Frustration Tolerance:
Finding and fixing coding errors encourages patience,
persistence, and trying different approaches.
Creative Expression:
Open-ended projects allow children to develop their own
characters, stories, games, and solutions.
Growth Mindset:
Testing ideas and learning from mistakes helps children
understand that improvement takes practice.
🤝
Category 03
Social & Collaborative Benefits
Peer Learning:
Sharing projects gives children opportunities to exchange
ideas and discover different approaches.
Communication Skills:
Explaining how a project works helps learners practise
describing their thinking clearly.
Teamwork:
Group coding activities encourage children to divide tasks,
share responsibilities, and work toward common goals.
Global Community:
Coding events and competitions, including
Codeavour, can give young innovators
opportunities to showcase their ideas and connect with others.
🚀
Category 04
Professional & Practical Benefits
Future Career Awareness:
Early exposure to AI, machine learning, and robotics can
introduce children to emerging technology fields.
Computational Thinking:
Learners practise sequencing instructions, recognizing
patterns, and breaking down problems.
STEM Foundation:
Coding projects can connect programming with science,
technology, engineering, and mathematics.
21st-Century Skills:
Project-based learning creates opportunities to practise
critical thinking, creativity, and collaboration.
Real-World Applications:
Interactive projects help children explore how software,
smart devices, and automated systems work.
💡
The key is learning by doing.
PictoBlox is most useful when children have opportunities to build
their own projects, test ideas, discuss results, and improve their
work with appropriate guidance.
🤖
Want to Explore More AI Learning Opportunities?
Discover why artificial intelligence is becoming an important
part of children’s technology education in our guide to
why AI learning is important for kids
.
Research, Projects & Outcomes
Does PictoBlox Really Work? What the Evidence Shows
Can learning to code help children become better problem-solvers,
more creative thinkers, and confident technology users? Research
into programming education offers encouraging insights. Hands-on
projects also give children practical opportunities to apply what
they learn.
Scientific Backing
These research figures were included in the supplied article draft.
Verify the original publications and study methods before presenting
the percentages as established findings.
🧩47%
Computational Thinking
The draft attributes a 47% improvement among students aged
8–14 to research from MIT Media Lab. Confirm the original
study, measured outcome, and comparison group before publication.
💡35%
Problem-Solving Abilities
The draft attributes this improvement to Stanford Graduate
School of Education research. Verify the publication and
whether the result applies to visual programming specifically.
🎯62% / 58%
Engagement & Retention
The draft reports increases in engagement and knowledge
retention from hands-on AI projects. Confirm the journal
article and the definitions used for both measures.
🔎
Research verification matters:
Before publishing these statistics, add the exact study titles,
authors, publication dates, and source links. Do not imply that
research about coding in general directly proves the same effects
for PictoBlox unless the study tested that platform.
Real Results from Young Coders
Project-based learning can give children a practical way to turn
curiosity into working creations. The following profiles use the
student examples supplied for this section; confirm the details
and obtain appropriate consent before publishing identifiable
stories or quotations.
👧
Aanya
Bangalore, India
Age 9 · AI Projects
Starting Point
Aanya was new to coding and reportedly lacked confidence
in mathematics.
Learning Journey
She explored PictoBlox face-detection projects over
six months.
Reported Outcomes
Built 12 AI projects independently.
Reportedly improved mathematics scores by 23%.
Noticed confidence changes within eight weeks.
“I feel like I can solve any problem now. Coding taught me
to keep trying different solutions.”
⏱️Reported confidence change: 8 weeks
👦
Ravi
Mumbai, India
Age 12 · Games & Robotics
Starting Point
Ravi enjoyed playing games but had not yet tried
creating his own.
Learning Journey
He worked on game development and robotics projects
over one year.
Reported Outcomes
Created a maze game with a scoring system.
Reportedly won a regional coding competition.
Began teaching younger children basic coding.
“Making my own game was cooler than playing anyone else’s.”
⏱️First working game: 6 weeks
👧
Priya
Chennai, India
Age 7 · Junior Blocks
Starting Point
Priya began using Junior Blocks without prior
technology experience.
Learning Journey
She explored animated storytelling and AI gesture
projects over four months.
Reported Outcomes
Created animated stories with voice-recognition features.
Reportedly developed reading skills through coding activities.
Presented a project at a school technology fair.
Building stories with code can help young learners connect
creativity with technology.
⏱️First animation: 3 weeks
Why Choose ItsMyBot?
Program quality, instructor experience, practical projects,
and opportunities to apply skills can all help families assess
a coding education program.
🏅
STEM Learning
ItsMyBot describes its PictoBlox programs as STEM.org-accredited
and aligned with K–12 computer science standards. Check the
current accreditation record and the exact program covered.
🤖
AI & Machine Learning
Project-based activities can introduce students to AI and
machine learning concepts using practical, age-appropriate
examples.
📚
5,000+ Students
The supplied draft reports that more than 5,000 students
have completed ItsMyBot PictoBlox courses, with 89% progressing
to advanced programming. Verify current enrollment records
and the calculation behind the progression rate.
🌍
Competitions & Instructors
The draft describes participation in international coding
competitions such as Codeavour and instructors with
professional STEM education certifications and over
50 years of combined teaching experience. Confirm awards,
credentials, and experience records before publication.
The Best Evidence Is What Children Can Build
A finished game, an interactive animation, or a working robotics
project gives children a tangible way to demonstrate what they
have learned. Combine these project outcomes with verified research,
documented student progress, and transparent program credentials
to evaluate how well a coding course meets its learning goals.
Editorial note: Student stories, quotations, numerical outcomes,
research attributions, accreditation claims, student totals,
competition results, and instructor credentials should be verified
by ItsMyBot before this section is published. Individual results
vary, and student examples alone do not establish that a course
caused a particular academic or developmental improvement.
Your Beginner’s Roadmap
How to Get Started with PictoBlox Projects
Getting started with coding doesn’t have to be complicated.
Follow these seven practical steps to help your child explore
PictoBlox, build confidence with coding, and gradually move
toward exciting AI and robotics projects.
💻Choose Your SetupDesktop or browser
🧩Learn the BasicsStart with simple blocks
🚀Build & ExperimentAdvance at your own pace
1
Download and Install PictoBlox
Getting Started
What to do:
Visit the official PictoBlox website to check the available
desktop downloads and browser-based options for your device.
Confirm operating-system compatibility before installing.
Why it matters:
Using the official source helps you access the legitimate
software and its supported features.
Beginner tip:
If a supported browser version is available for your device,
you may be able to start without installing desktop software.
Check the official site for current availability.
2
Choose the Right Coding Mode
Find Your Level
What to do:
Choose a starting point based on your child’s reading ability,
experience, and comfort with coding. Junior Blocks may suit
younger beginners, Standard Blocks offer a visual drag-and-drop
approach, and Python mode introduces text-based programming
for learners ready for it.
Why it matters:
Starting with manageable challenges helps children learn
the fundamentals before moving on to more advanced projects.
🎯
Beginner tip:
Many children around ages 8–10 can start with standard
block-based coding even without previous experience.
Treat age ranges as a guide rather than a strict rule.
3
Explore the Interface
10–15 Minutes
What to do:
Spend 10–15 minutes exploring the workspace. Find the sprite
editor, backdrop chooser, block categories, and project controls.
Try moving a sprite or changing a backdrop.
Why it matters:
Knowing where the main tools are makes it easier to concentrate
on coding instead of searching for interface features.
🧭
Beginner tip:
Look for tutorials or help resources in your installed
version. Menu names and available tutorials can vary
between versions and platforms.
4
Start with a Simple Project
First Creation
What to do:
Create a simple “Hello World” animation or make a sprite move
across the screen. Experiment with events, movement, and
appearance blocks.
Why it matters:
Small projects introduce core coding ideas, such as sequencing
instructions and responding to events, without overwhelming
a new learner.
✨
Beginner tip:
Explore example projects if they’re available in your version.
Change a character, adjust its movement, or add a sound to
see how small code changes affect the result.
5
Add AI Extensions Gradually
Explore AI
What to do:
Once your child is comfortable with basic coding logic,
explore supported AI extensions such as face detection,
hand-gesture recognition, or text recognition.
Why it matters:
Starting with basic programming concepts makes it easier
to understand how AI features can interact with code
and control a project.
🤖
Beginner tip:
Try an interactive face-detection project if your version
supports it. Check camera permissions and privacy settings
before enabling camera access.
6
Connect Real Hardware
Optional
Go Beyond the Screen
What to do:
If you have compatible hardware, such as an Arduino,
micro:bit, or Quarky robot, follow the official setup
instructions for your specific device and PictoBlox version.
Why it matters:
Hardware projects let children connect code with physical
actions, such as controlling lights, reading sensor values,
or moving a robot.
🔧
Beginner tip:
You don’t need to buy hardware immediately. Start with
digital projects and consider a robotics kit when your
child is ready for hands-on experiments.
7
Join the Learning Community
Keep Growing
What to do:
Explore official forums, tutorial videos, project challenges,
and coding competitions. Share projects where appropriate
and learn from other creators.
Why it matters:
Seeing how others approach a challenge can introduce new
ideas and encourage children to improve their own projects.
🌍
Beginner tip:
Look for workshops and coding challenges from ItsMyBot
and other reputable learning communities. Parents should
supervise online participation and review sharing settings
before children publish projects.
Ready to Build Your First Coding Project?
Start with a small animation, experiment with a few blocks,
and gradually work toward games, AI experiments, and robotics.
Consistent practice and curiosity matter more than getting
everything right on the first attempt.
What Mistakes Should You Avoid When Starting PictoBlox?
Learning to code should feel like an adventure, not a test.
A few common beginner mistakes can make PictoBlox more confusing
than it needs to be. Here’s how children and parents can avoid
unnecessary frustration and make the learning journey more enjoyable.
💡
Remember: Progress Matters More Than Perfection
Children learn at different speeds. Start with manageable
projects, encourage experimentation, and give young coders
room to discover solutions on their own.
01
Starting with Complex AI Projects
Build the Foundation First
⚠️Why It’s a Problem
Jumping straight into face detection or machine learning
can overwhelm beginners who haven’t yet learned basic
blocks, events, sequences, and conditions.
✓What to Do Instead
Start with sprite movement, simple animations, and basic
games. Try a few beginner sessions before introducing
AI extensions, adjusting the pace to your child’s comfort.
02
Not Saving Projects Regularly
Protect Their Work
⚠️Why It’s a Problem
Unexpected browser closures, device issues, or unsaved
changes can lead to lost work and discourage children
who have spent time building a project.
✓What to Do Instead
Save projects regularly using the save options available
in your version. Create a dedicated
PictoBlox Projects folder and use clear
filenames such as Maze-Game-v1.
Check that the file was saved successfully.
03
Skipping Tutorial Examples
Learn by Exploring
⚠️Why It’s a Problem
Starting every project from scratch can make it harder
for beginners to understand how blocks fit together
and how common coding patterns work.
✓What to Do Instead
Explore available tutorials and example projects.
Choose a simple example, change a character or movement,
and observe how the result changes. Experimenting with
existing code can be a useful first step toward
independent creation.
04
Thinking Hardware Is Essential
Learn at Your Own Pace
⚠️Why It’s a Problem
Digital projects teach valuable coding concepts, but
children may miss opportunities to explore sensors,
physical inputs, and robotics if they never try
hardware-based activities.
✓What to Do Instead
Begin with virtual projects and introduce compatible
hardware when your child is ready and interested.
A robotics kit is optional, not a requirement for
learning programming fundamentals.
05
Parents Taking Over Every Problem
Encourage Independence
⚠️Why It’s a Problem
Fixing every error immediately can prevent children
from practising debugging, testing ideas, and developing
confidence in their own problem-solving abilities.
✓What to Do Instead
Give children time to investigate a problem before offering
help. Ask guiding questions such as
“What did you expect to happen?” or
“Which block could we check first?”
Offer hints rather than immediately providing the solution.
06
Comparing Progress with Other Children
Celebrate Individual Growth
⚠️Why It’s a Problem
Children have different interests, learning styles,
and starting points. Constant comparisons can create
unnecessary pressure and make coding feel like a competition.
✓What to Do Instead
Celebrate personal milestones. Recognize when your child
learns loops, fixes a bug independently, or finishes a
first game. Focus on how far they’ve come rather than
how quickly someone else progresses.
Quick Checklist for Parents
✓Start small: Choose projects that match your child’s current skills.
✓Save regularly: Make saving and checking files part of the routine.
✓Ask questions: Encourage children to explain their thinking.
✓Celebrate effort: Recognize experimentation, persistence, and progress.
✓Keep it enjoyable: Let children explore projects that interest them.
✓Be patient: Mistakes are a normal part of learning to code.
Let Kids Experiment, Make Mistakes, and Create
The goal of learning PictoBlox isn’t to finish the most projects
or master every feature immediately. It’s to help children become
curious, independent problem-solvers who enjoy creating with
technology. Give them a strong foundation, supportive guidance,
and enough freedom to discover what they can build.
A Parent’s Resource Guide
PictoBlox Resources for Parents
You don’t have to navigate your child’s coding journey alone.
From troubleshooting and project ideas to learning support and
financial assistance, these resources can help you guide your child
with confidence.
🛠️
Quick Help & Support
Find help when something isn’t working.
PictoBlox Community Forum
Explore discussions and troubleshooting guidance from the
PictoBlox community.
Visit community forum ↗
Visit the official website to find available support options
and contact information.
Visit STEMpedia ↗
🤝
Community Support
Learn alongside other families and young creators.
Parent Facebook Groups
Look for active PictoBlox or kids’ coding communities where
parents share ideas and experiences.
Student Discord Communities
Online communities may offer peer learning and project
discussions. For children, use only age-appropriate,
parent-approved and well-moderated spaces.
Local Coding Clubs
Find opportunities for your child to learn and collaborate
in person. Try searching for
PictoBlox + your city.
💡
Costs & Financial Assistance
Explore ways to make coding more accessible.
PictoBlox Software
Check the official PictoBlox website for the current software
version, supported platforms and any paid features.
Visit PictoBlox ↗
Hardware Discounts
If your child wants to work with physical computing, check
current offers and educational pricing for Quarky robots,
Arduino boards and compatible kits.
Explore STEMpedia products ↗
Course Scholarships
Ask ItsMyBot about any available need-based scholarships,
eligibility criteria and application requirements before
enrolling.
📚
Educational Resources
Find inspiration for your child’s next project.
Project Ideas & Tutorials
Browse project tutorials to discover ideas involving coding,
robotics, AI and interactive creations.
Explore project resources ↗
Educator & Homeschooling Guides
Look for structured activities and tutorials that can help
parents introduce coding concepts at home.
Browse learning resources ↗
Codeavour Competition
Explore this AI and coding competition to learn about its
current age groups, participation rules and upcoming events.
Visit Codeavour ↗
ItsMyBot Parent Support
Give Your Child Support Beyond the Screen
Learning to code is easier when children have guidance,
opportunities to practise and encouragement along the way.
Explore the learning support options available through ItsMyBot.
✓
Free Trial Class
Ask about a trial session to understand the teaching approach
and see whether the class suits your child’s interests.
✓
Class Recordings
Check whether recordings are available for your child’s
enrolled course so they can revisit lessons and practise
concepts at their own pace.
✓
Progress Updates
Ask how instructors share learning progress, project
milestones and feedback with parents.
✓
Parent Workshops
Find out whether workshops or guidance sessions are available
to help you support your child’s coding journey at home.
Not sure where to begin? Connect with ItsMyBot to explore
suitable coding classes and support options for your child.
A little reminder for parents:
Your child doesn’t need to master everything at once. Start with
one beginner-friendly project, encourage experimentation and
celebrate each small achievement. When using online communities,
check age requirements, privacy settings and moderation policies
before allowing your child to participate.
Your Child’s Coding Journey Starts Here
Turn Screen Time into Skill-Building Time with PictoBlox
PictoBlox projects can transform ordinary screen time into an
opportunity to explore, create and solve problems. From beginner
animations to artificial intelligence and robotics, children can
develop practical skills while bringing their own ideas to life.
The goal isn’t to learn everything at once—it’s to
stay curious, keep experimenting and build confidence one
project at a time.
4 Key Takeaways for Parents
Keep these simple principles in mind as your child gets started.
01
Start Simple, Then Build Up
Begin with beginner-friendly sprite animations and interactive
stories. Once your child feels comfortable, introduce more
advanced projects involving AI, machine learning and robotics.
02
Choose the Right Learning Mode
Explore PictoBlox Junior for younger learners, Standard for
block-based coding and Python mode for text-based programming
when your child is ready. Choose based on their age, experience
and confidence.
03
Connect Digital Ideas to the Real World
Combine on-screen projects with physical computing, sensors
and robotics when appropriate. Hands-on activities can help
children connect programming concepts to real-world outcomes.
04
Learn, Share and Keep Exploring
Use tutorials, suitable coding communities and guided learning
opportunities to discover new ideas, solve problems and stay
motivated. Celebrate progress rather than expecting perfection.
💜
Your child doesn’t need to wait until college to explore
coding, AI and robotics.
With accessible tools like PictoBlox, children can begin discovering
these fields today. Every animation, experiment and completed project
is a chance to practise creativity, logical thinking and
problem-solving—skills that can help them well beyond the screen.
Take the First Step
Ready to Turn Your Child’s Screen Time into Skill Time?
Start exploring PictoBlox this week and encourage your child to
build their first project. Prefer guided learning? Explore ItsMyBot
and ask about a free trial class to discover how expert instruction
can support your child’s coding journey.
Have questions about PictoBlox, beginner projects, device
compatibility or coding classes? Find answers to common questions
parents ask before getting started.
01
What is PictoBlox?
+
PictoBlox is a coding platform that helps
children learn programming through visual, drag-and-drop blocks.
It also supports learning activities involving artificial
intelligence (AI), machine learning, robotics and interactive
projects. The visual approach can help beginners understand
programming concepts before moving on to text-based coding.
PictoBlox lets children snap together colorful coding blocks
to create instructions for a program. Think of the blocks as
digital building pieces: each block performs an action, and
combining them creates a sequence of instructions.
Children can use these instructions to animate characters,
make games, build interactive stories and explore supported AI
or robotics projects. They can test their programs, identify
mistakes and improve their creations as they learn.
03
What types of PictoBlox projects are available?
+
Children can explore a wide range of project ideas, depending
on their experience and the features or hardware they use.
Examples include:
Beginner projects: sprite animations,
interactive stories, quizzes and simple games.
AI projects: face detection, gesture
recognition, image classification and voice-related
interactions where supported.
Advanced projects: robotics, sensor-based
systems, IoT concepts and virtual assistant prototypes.
Hardware, extensions and device requirements vary by project.
04
How do I get started with PictoBlox projects?
+
Start by visiting the
PictoBlox website
to check the available online and downloadable versions for
your device. Choose a beginner-friendly tutorial and try a
simple sprite animation or interactive story.
Once your child is comfortable with basic blocks, introduce
more complex projects. AI extensions and physical computing
projects can come later, when your child is ready and the
necessary device or hardware is available.
05
What happens in a typical PictoBlox learning session?
+
A typical session might begin with choosing a project idea and
deciding what it should do. The child then selects sprites or
backgrounds, arranges coding blocks, runs the program and
checks whether it behaves as expected.
Testing and debugging are important parts of the process.
Children learn to make adjustments, try different approaches
and improve their projects. Depending on the activity, they
may also demonstrate their finished creation to a parent,
teacher or classmate.
06
How long does it take to learn PictoBlox?
+
The time needed depends on a child’s age, previous experience,
project difficulty and practice schedule. Some beginners can
create a simple animation in one short session, while
developing confidence with programming concepts takes
continued practice.
More advanced AI and robotics projects may require additional
time to understand the concepts and set up the necessary
extensions or hardware. Rather than following a strict
timeline, focus on steady progress and projects that keep
your child interested.
07
Is PictoBlox safe for children, and how is privacy handled?
+
Children’s privacy depends on the specific PictoBlox features
they use, the device, and any connected services or extensions.
Before enabling camera, microphone, online sharing or account
features, review the current
official STEMpedia resources
and applicable privacy information.
Parents should supervise online activity, check app
permissions, avoid sharing identifying information and review
the privacy settings of any community platform. Do not assume
that every AI feature processes data locally or that no data
is stored without checking the relevant documentation.
08
Will PictoBlox work on my child’s device?
+
Compatibility depends on the PictoBlox version, operating
system, browser and project features. Visit the
official PictoBlox website
to check the current requirements before installing or using
the platform online.
If your child plans to use camera-based AI, connect a robot
or work with external hardware, check those additional
requirements separately. Not every feature or hardware
extension is necessarily available on every device.
09
What if my child isn’t comfortable learning in English?
+
Visual coding can make programming concepts easier to explore
because children build programs by arranging blocks instead
of typing every instruction. However, some reading may still
be needed for instructions, menus and tutorials.
You can support your child by explaining concepts in a
familiar language, using visual demonstrations and choosing
beginner-friendly projects. If you prefer instructor-led
learning, ask ItsMyBot which teaching languages and support
options are currently available.
10
Where can I find PictoBlox classes or coding clubs near me?
+
Check local coding academies, libraries, STEM learning
centers and robotics clubs for workshops that use PictoBlox.
Searching online for “PictoBlox classes”
alongside your city name can help you discover nearby options.
If local classes aren’t available, you can also explore
online learning. Visit
ItsMyBot
to learn about its current course offerings and ask whether
online instruction is suitable for your child’s needs.
11
How can I choose the right PictoBlox learning program for my child?
+
Look for a program that matches your child’s age, current
skills, interests and preferred learning style. Consider
class size, instructor experience, project-based activities,
scheduling, feedback for parents and opportunities to practise
between lessons.
ItsMyBot may be one option to explore. Contact the team to
confirm current course formats, mentoring options, age
suitability and scheduling before enrolling.
12
Are there free or low-cost ways to learn PictoBlox?
+
Start by checking the current PictoBlox software options,
free tutorials and project resources. These can help children
begin exploring coding before you invest in a structured
course or physical hardware.
If you’re considering paid instruction, ask ItsMyBot whether
a free trial, scholarship or other financial assistance is
currently available. Confirm eligibility and any costs
directly with the provider.
Ready for the Next Step?
Help Your Little Coder Turn Curiosity into Creativity
Give your child an opportunity to explore coding through
structured, project-based learning. Discover ItsMyBot’s
Little Coder program and find out whether it fits your
child’s interests and learning goals.