Reading Time: 10 mins

Many kids want to build cool tech projects but don’t know where to start. Complex electronics seem scary, and most tutorials assume you already know everything.
Watching YouTube videos of amazing smart devices feels frustrating when you can’t create anything yourself. You have ideas but lack the confidence to bring them to life.
IoT-based projects for beginners offer the perfect entry point. These hands-on activities teach real skills through building actual devices you can use at home. You’ll learn coding, electronics, and problem-solving while creating something amazing.
IoT projects bridge the physical and digital worlds. When you make an LED blink from your phone or build a device that waters plants automatically, you’re learning the same technology powering smart homes, connected cars, and wearable fitness trackers.
The best part? You don’t need expensive equipment or years of experience. With basic components costing under $50 and simple programming languages, anyone aged 10 and up can start building today.
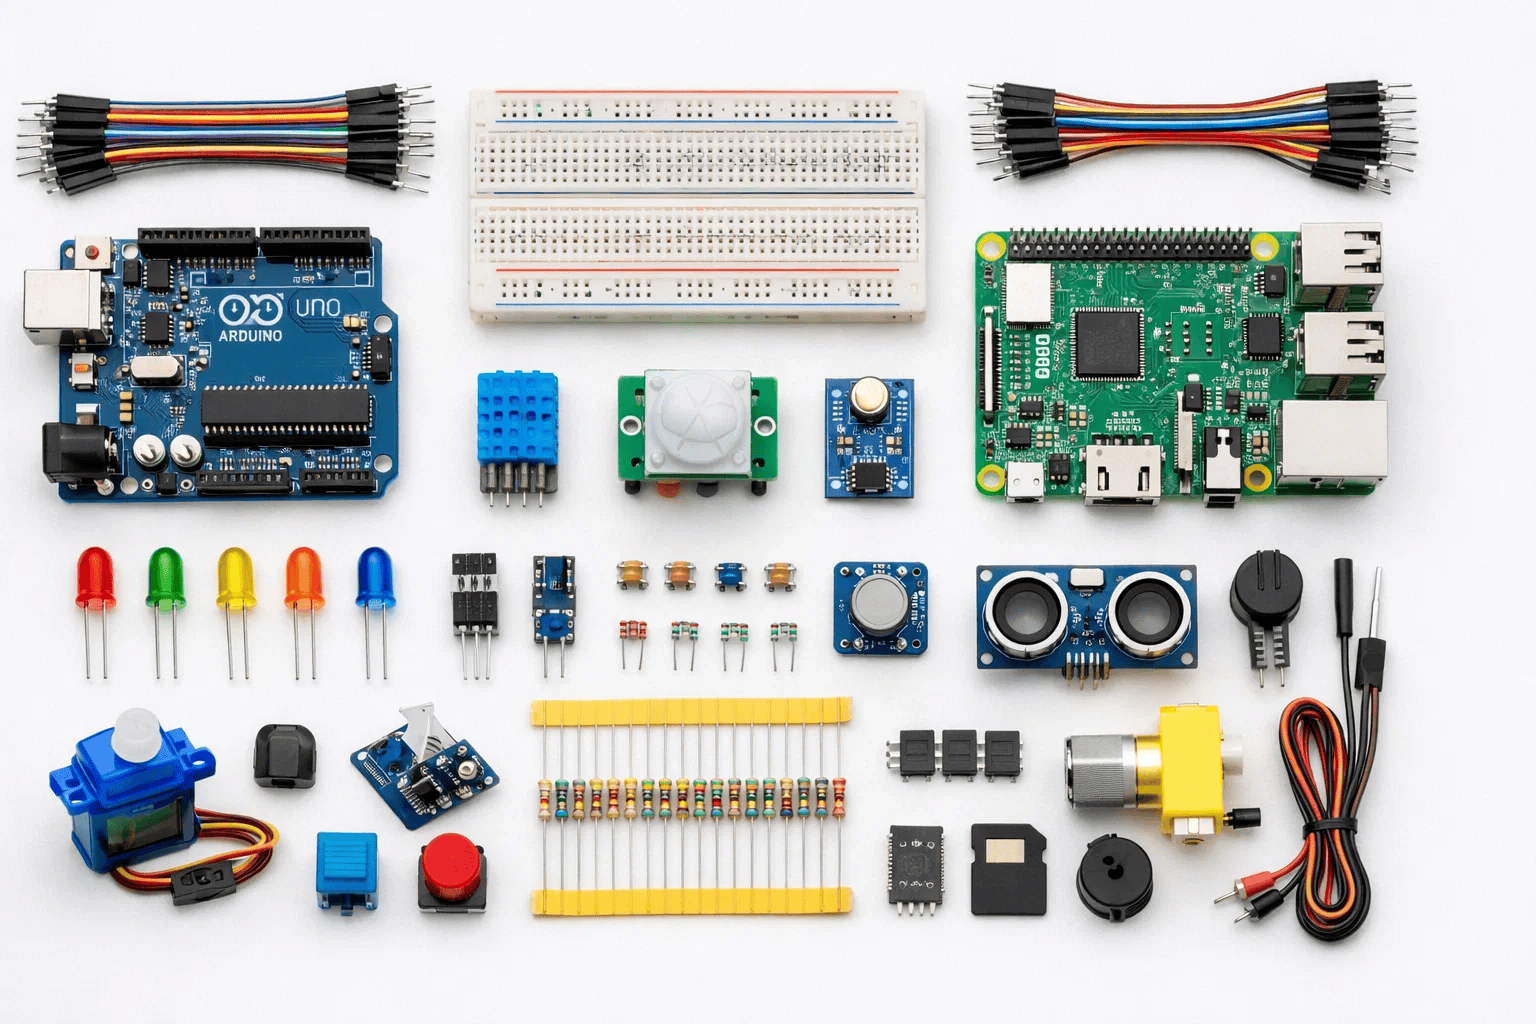
Before diving into IoT-based projects for beginners, gather these fundamental tools. Don’t worry—you won’t need everything at once!
Microcontroller Boards:
Sensors and Actuators:
Connection Components:
For hands-on robotics learning, explore our guide on best beginner robotics kits which include many IoT components.
Programming Platforms:
The Arduino Project Hub provides thousands of free tutorials and project ideas for beginners.
Coding Languages:
Complete kits save money and ensure compatibility. Look for:
Let’s explore IoT projects organized by difficulty level. Start with Level 1 and progress as your confidence grows!
1. Smart LED Control via Phone
Build an app-controlled LED that changes colors based on your commands.
What You’ll Learn:
Components Needed:
How It Works: Your phone sends color commands through Bluetooth. The microcontroller receives these signals and adjusts the LED colors accordingly.
This project teaches fundamental concepts used in professional IoT development while building something you can actually use.
2. Temperature and Humidity Monitor
Create a device that displays room temperature and humidity on your phone.
Why It’s Great: You’ll learn sensor integration and data visualization—skills used in weather stations and smart thermostats.
Real-World Use: Monitor your bedroom conditions, check if your plants have the right environment, or track temperature changes throughout the day.
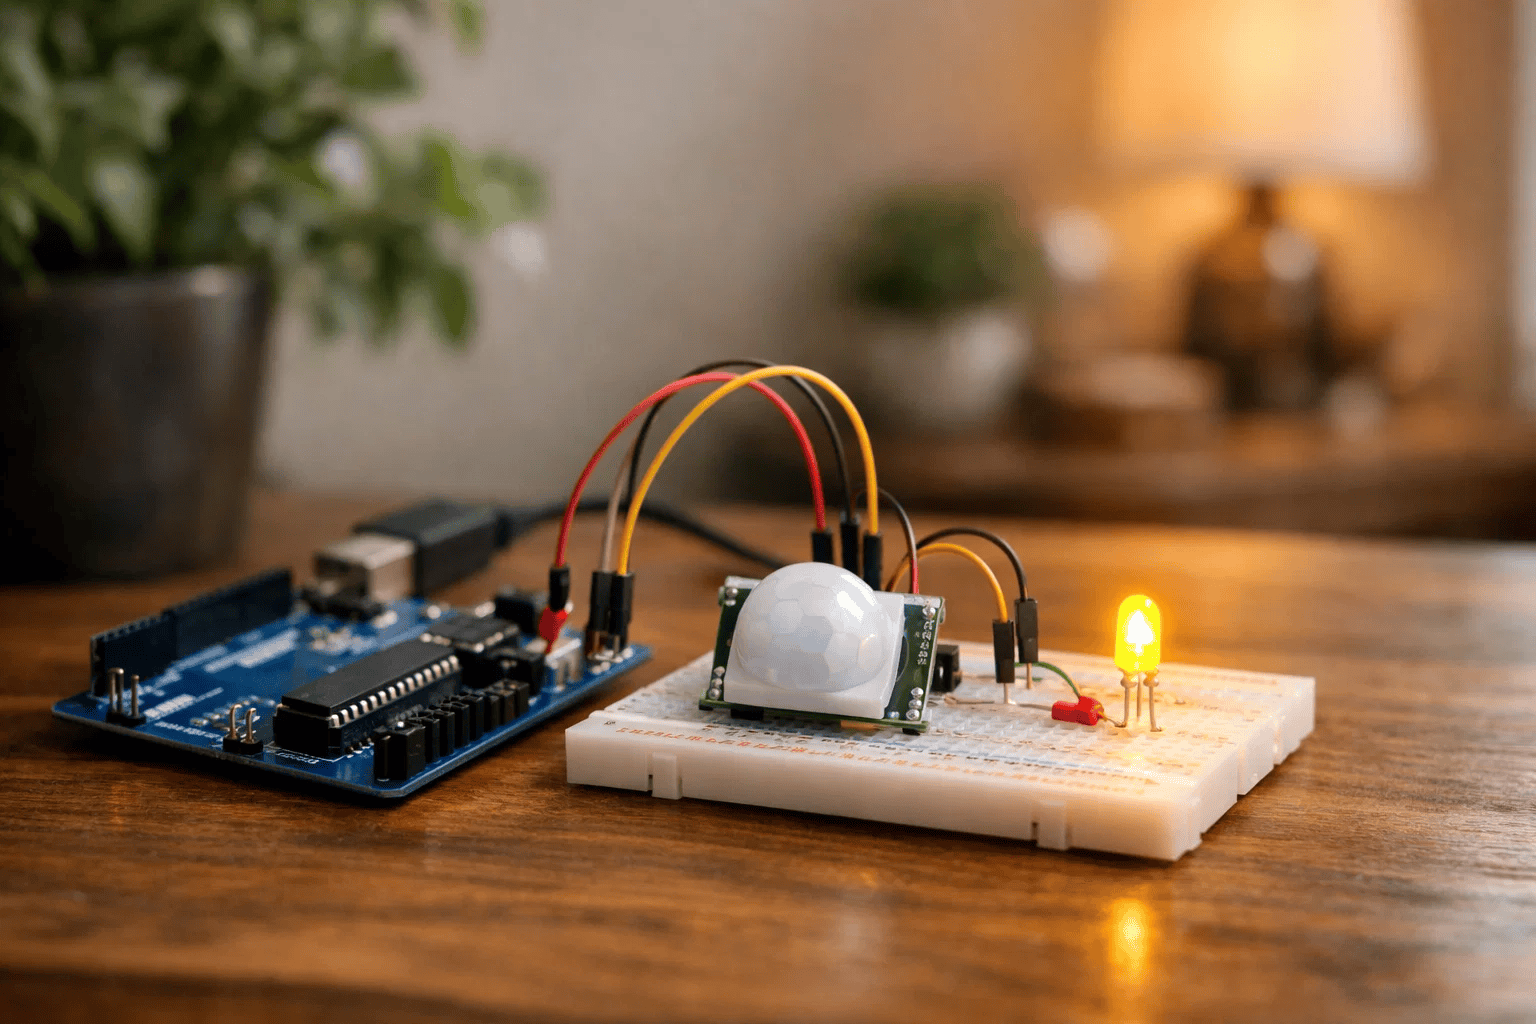
3. Motion-Activated Light
Build a light that automatically turns on when someone enters a room.
Components:
Practical Application: This is how automatic hallway lights, security systems, and energy-saving devices work. You’re building real smart home technology!
Similar motion detection principles apply when building remote-controlled robots.
4. Smart Doorbell with Notifications
Create a doorbell that sends alerts to your phone when pressed.
What Makes It Cool: You’ll integrate physical buttons with internet connectivity and mobile notifications.
Components:
5. Simple Plant Watering Reminder
Build a device that reminds you when your plant needs water based on soil moisture.
Learning Goals:
This project introduces concepts used in our detailed smart garden case study.
6. Air Quality Monitor
Measure air quality and display readings on a small screen or phone app.
Why It Matters: Learn about environmental sensing and data logging—skills valuable for science fair projects.
Components:
7. Smart Parking Assistant
Use ultrasonic sensors to detect when your garage parking spot is occupied.
How It Works: Sensors measure distance. When a car gets close, LEDs change color (green = safe, yellow = slow down, red = stop).
Real-World Connection: Shopping malls and airports use similar systems for parking guidance.
8. Automated Pet Feeder
Build a device that dispenses pet food at scheduled times or via phone command.
What You’ll Create:
Skills Gained: Motor control, timing functions, and practical automation.
9. Smart Door Lock System
Create a door lock controlled by RFID cards or phone app.
Components:
Safety Note: Use this on a storage box or practice door—not your main house door until you fully test security!
10. Weather Station
Build a comprehensive weather monitoring system measuring temperature, humidity, pressure, and light levels.
Advanced Features:
Understanding IoT architecture helps—check our 5-layer architecture of IoT guide.

11. Smart Home Automation Hub
Control multiple devices (lights, fans, locks) from a single mobile dashboard.
Complexity: You’ll manage multiple sensors and actuators, create custom interfaces, and handle various communication protocols.
What You’ll Master:
12. Voice-Controlled Room Automation
Integrate voice commands to control lights, temperature, and music.
Technology Used:
This project combines IoT with AI concepts kids can learn.
13. Smart Security System
Build a comprehensive security solution with motion detection, camera integration, and instant alerts.
Features:
14. Energy Monitoring System
Track power consumption of household devices and identify energy-saving opportunities.
Components:
Real Impact: This project teaches sustainability and energy awareness while building technical skills.
15. Automated Greenhouse
Create a complete plant care system that adjusts watering, lighting, and ventilation automatically.
Advanced Systems:
Skills Integration: This combines everything you’ve learned—sensors, actuators, data processing, and automation logic.
Similar concepts apply to creating line follower robots that respond to environmental inputs.
Let’s build a Temperature Alert System that sends notifications when your room gets too hot or cold.
Step 1: Gather Components — Collect ESP32, DHT11 sensor, breadboard, and jumper wires Why it works: Having everything ready prevents interruptions during building
Step 2: Connect the Hardware — Wire DHT11 sensor to ESP32 (VCC to 3.3V, GND to ground, data pin to GPIO 4) Why it works: Proper connections ensure sensors communicate correctly with the microcontroller
Step 3: Install Required Libraries — Add DHT sensor library and Blynk library to Arduino IDE Why it works: Libraries contain pre-written code that makes sensor reading and cloud communication simple
Step 4: Write the Code — Program ESP32 to read temperature every 30 seconds and send data to Blynk app Why it works: Regular monitoring catches temperature changes quickly
Step 5: Set Up Mobile App — Configure Blynk app with temperature display and alert thresholds Why it works: Visual feedback helps you understand your environment better
Step 6: Test and Adjust — Run the system, trigger alerts by heating/cooling sensor, refine threshold values Why it works: Testing reveals issues before real-world deployment
Step 7: Deploy and Monitor — Place sensor in desired location and observe patterns over several days Why it works: Real data helps you understand how temperature changes throughout the day
For coding beginners, start with visual programming using our Scratch tutorials before moving to text-based code.

Mistake 1: Not Checking Component Compatibility
Mistake 2: Skipping Circuit Testing
Mistake 3: Weak Wi-Fi Passwords
Mistake 4: Ignoring Power Requirements
Mistake 5: Overcomplicated First Projects
Mistake 6: Not Commenting Code
Student: Alex Chen, 13 years old, Austin, Texas
Initial Challenge: Alex wanted to help his grandmother who has mobility challenges. “She struggled getting up at night to turn off lights or check if doors were locked,” Alex explained during his science fair presentation.
Solution Implemented: Over 12 weeks working with ItsMyBot mentors, Alex built a comprehensive smart home system:
Action 1: Started with simple LED control via phone app
Action 2: Added motion-activated night lights
Action 3: Implemented voice-controlled room lights
Action 4: Created smart door lock monitoring system
Action 5: Developed automated medication reminder
Results Achieved:
“IoT-based projects for beginners taught me that age doesn’t limit what you can build,” Alex shared. “The real barrier was just getting started. Once you build that first LED circuit, everything else becomes possible.”

The easiest IoT-based projects for beginners include LED control via smartphone, temperature monitoring with alerts, and motion-activated lights. These projects require minimal components (under $30), take 1-2 hours to complete, and teach fundamental IoT concepts like sensor integration and wireless communication.
No programming experience is required! Many IoT platforms use visual block-based coding similar to Scratch. Start with drag-and-drop interfaces like MIT App Inventor or Blynk, then progress to simple Arduino code. Most beginner projects use only 20-30 lines of code with clear tutorials.
Arduino Uno is the best starting microcontroller because of extensive documentation, large community support, and forgiving design. For Wi-Fi projects, ESP32 offers built-in connectivity at low cost ($8-12). Raspberry Pi works well for complex projects requiring more computing power. Start with Arduino, then expand based on project needs
Complete starter kits cost $40-80 and include everything for 10+ projects. Individual basic projects cost $5-15 for components. A typical beginner setup includes Arduino board ($25), breadboard ($5), sensor kit ($15), and jumper wires ($5). Schools and libraries often provide free access to maker spaces with these tools.
Yes! Many beginner IoT projects work without internet using Bluetooth or direct connections. Examples include motion-activated lights, temperature displays, and button-controlled devices. Internet connectivity becomes important for remote monitoring, cloud data storage, and mobile app control from anywhere.
Start with Arduino’s simplified C/C++ (easier than it sounds—most code uses simple commands). Python works great for Raspberry Pi projects. Visual programming tools like Blockly require no traditional coding. As you advance, JavaScript helps with web dashboards and data visualization. Focus on one language initially.
IoT projects are safe when using low-voltage components (3.3V-5V) and following basic guidelines. Adult supervision helps during initial projects. Avoid connecting directly to household electricity. Use battery power or USB adapters. Projects teach electrical safety through hands-on learning. Our STEM education resources emphasize safe learning practices.
Simple projects like LED control take 1-2 hours. Intermediate projects like weather stations require 3-5 hours. Complex systems like smart home automation need 6-10 hours spread over several sessions. Learning time decreases rapidly—your fifth project will take half the time of your first because skills compound.
IoT-based projects for beginners open doors to endless creative possibilities. By starting with simple sensor integration and gradually building complexity, young innovators develop skills that power tomorrow’s smart cities, connected healthcare, and sustainable technology.
Key Takeaways:
The Internet of Things isn’t just about connecting devices—it’s about solving real problems creatively. Every IoT-based project for beginners teaches critical thinking, systematic troubleshooting, and the confidence to tackle bigger challenges.
Your journey from complete beginner to confident creator starts with a single LED blinking on command. That first success sparks curiosity that leads to building devices that genuinely improve lives, just like Alex’s smart home system for his grandmother.
Ready to turn screen time into skill time? Explore ItsMyBot’s personalized robotics and coding courses where expert mentors guide you through hands-on IoT projects tailored to your pace and interests. Your future as a tech innovator begins with that first circuit.