
Reading Time: 14 mins
Are you struggling to create interactive, visually appealing applications with Python? Many beginners find themselves stuck in the command line, wondering how to build programs with buttons, windows, and user-friendly interfaces that people actually want to use.
Here’s the frustrating reality: without GUI (Graphical User Interface) skills, your Python projects remain text-based and limited. You’re missing out on creating engaging applications that could showcase your programming abilities and solve real-world problems in an intuitive way.
The solution? This comprehensive Python Tkinter tutorial will transform you from a command-line coder into a GUI developer. You’ll learn to create beautiful, interactive applications step-by-step, with practical examples and projects you can build today. By the end of this guide, you’ll have the skills to develop professional-looking desktop applications that impress users and potential employers.
Python Tkinter (short for “Tk interface”) is Python’s standard GUI toolkit that comes pre-installed with most Python distributions. Think of it as your gateway to creating desktop applications with windows, buttons, menus, and all the visual elements users expect in modern software.
Here’s what makes Tkinter special:
In my experience teaching Python programming to kids, I’ve found that Tkinter provides the perfect balance between simplicity and functionality. It’s complex enough to create professional applications, yet simple enough for beginners to grasp quickly.
Tkinter is based on the Tk toolkit, originally developed for the Tcl programming language. When Python was created, the developers recognized the need for a standard GUI library and chose to integrate Tk, making it accessible through Python’s object-oriented interface.
Immediate Availability: Unlike other GUI frameworks like PyQt or wxPython, Tkinter requires zero additional setup. This means you can start building GUIs immediately after installing Python.
Learning Curve Advantages:
Professional Applications: Despite its reputation as a “beginner’s toolkit,” Tkinter powers numerous commercial applications. Companies like IDLE (Python’s default editor) and many scientific applications rely on Tkinter for their interfaces.
Educational Benefits: From my 15 years of experience in educational technology, I’ve observed that students who master Tkinter concepts easily transition to other GUI frameworks and even web development frameworks.
Before diving into GUI development, let’s ensure your system is ready. Open your terminal or command prompt and run:
python --version
You’ll need Python 3.6 or later for optimal Tkinter compatibility. Most modern Python installations include Tkinter by default.
Create a simple test to verify Tkinter is working:
import tkinter as tk

# This should open a small empty window
root = tk.Tk()
root.title("Tkinter Test")
root.mainloop()
If a window appears, congratulations! Your environment is ready. If you encounter errors, you may need to install the python3-tk package on Linux systems.
While any text editor works for Tkinter development, I recommend:
For hardware requirements, check our guide on minimum hardware requirements for Python programming.
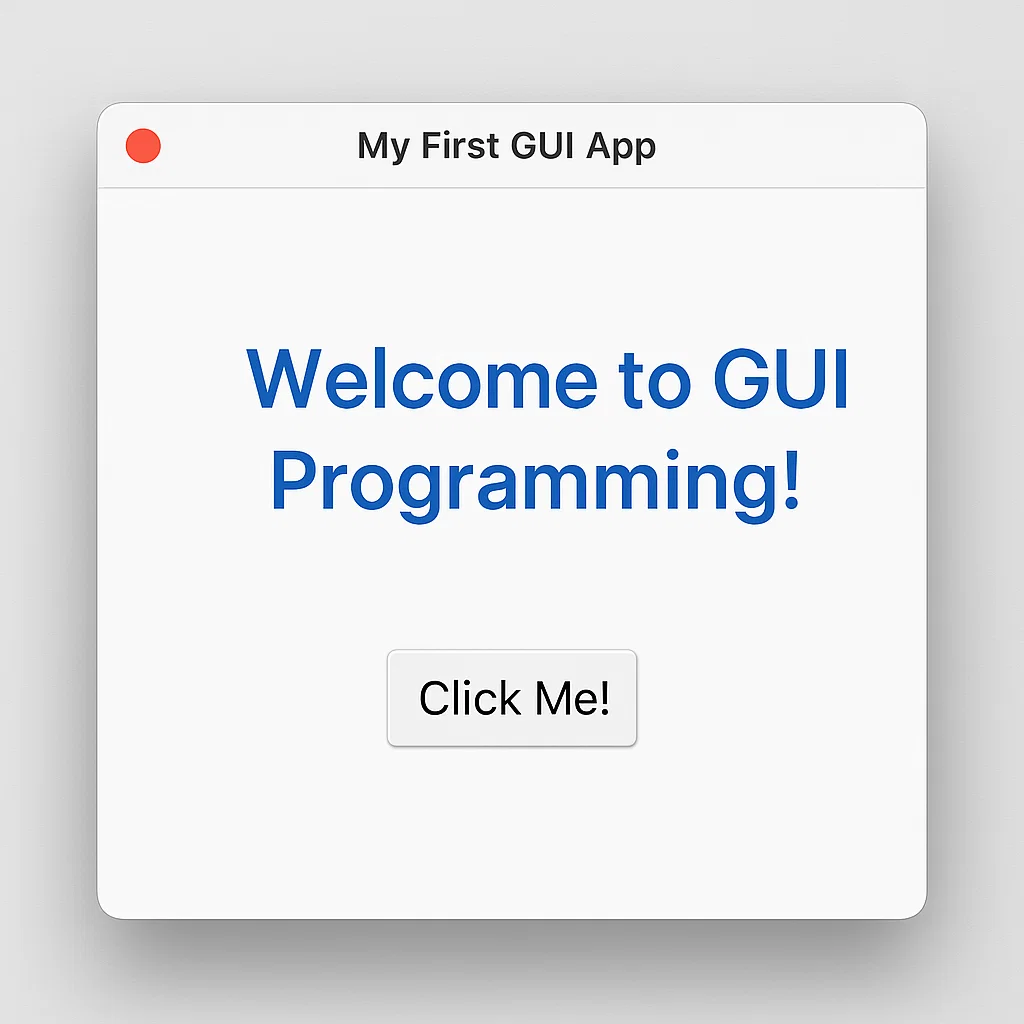
Let’s create your first interactive GUI application. This “Hello World” program demonstrates the fundamental structure of every Tkinter application:
import tkinter as tk
from tkinter import ttk

# Create the main application window
root = tk.Tk()
root.title("My First GUI App")
root.geometry("400x300")

# Add a welcome label
welcome_label = ttk.Label(root, text="Welcome to GUI Programming!", font=("Arial", 16))
welcome_label.pack(pady=20)

# Add an interactive button
def say_hello():
    print("Hello from your first GUI app!")

hello_button = ttk.Button(root, text="Click Me!", command=say_hello)
hello_button.pack(pady=10)

# Start the application
root.mainloop()
Understanding the Code Structure:
tkinter and ttk for modern stylingpack() method arranges widgetsmainloop() keeps the application runningThis pattern forms the foundation of every Tkinter application you’ll build.
Think of Tkinter as a family tree where the root window is the parent, and all other elements are children or grandchildren. This hierarchical structure determines how widgets behave and appear.
Core Widget Categories:
Container Widgets:
Tk() – Main application windowFrame – Grouping container for other widgetsToplevel – Additional windowsDisplay Widgets:
Label – Static text or imagesText – Multi-line text display and editingCanvas – Drawing and graphics areaInput Widgets:
Entry – Single-line text inputButton – Clickable actionsCheckbutton – Boolean selectionsRadiobutton – Multiple choice selectionsScale – Slider controlsTkinter offers three geometry managers for positioning widgets:
Pack Manager: Best for simple, linear layouts
widget.pack(side=tk.TOP, fill=tk.X, expand=True)
Grid Manager: Ideal for table-like arrangements
widget.grid(row=0, column=1, sticky="nsew")
Place Manager: Provides absolute positioning
widget.place(x=50, y=100, width=200, height=30)
Pro Tip: Never mix geometry managers within the same container window – it causes conflicts and unpredictable behavior.
Labels serve as the information backbone of your GUI applications. They display static text, images, or dynamic content that updates based on user interactions.
import tkinter as tk
from tkinter import ttk

root = tk.Tk()
root.title("Label Examples")

# Basic text label
basic_label = ttk.Label(root, text="This is a basic label")
basic_label.pack(pady=5)

# Styled label with custom font
styled_label = ttk.Label(
    root,
    text="Styled Label",
    font=("Helvetica", 14, "bold"),
    foreground="blue"
)
styled_label.pack(pady=5)

# Dynamic label that updates
dynamic_text = tk.StringVar()
dynamic_text.set("Click the button to change me!")
dynamic_label = ttk.Label(root, textvariable=dynamic_text)
dynamic_label.pack(pady=5)

def update_label():
    dynamic_text.set("Label updated successfully!")

update_button = ttk.Button(root, text="Update Label", command=update_label)
update_button.pack(pady=10)

root.mainloop()
Buttons trigger actions and make your applications interactive. Understanding button configuration and event handling is crucial for engaging user experiences.
import tkinter as tk
from tkinter import ttk, messagebox

root = tk.Tk()
root.title("Button Examples")

# Basic button with simple action
def simple_action():
    print("Button clicked!")

simple_button = ttk.Button(root, text="Simple Button", command=simple_action)
simple_button.pack(pady=5)

# Button with messagebox
def show_message():
    messagebox.showinfo("Information", "This is a message from your button!")

message_button = ttk.Button(root, text="Show Message", command=show_message)
message_button.pack(pady=5)

# Toggle button functionality
is_enabled = tk.BooleanVar()

def toggle_state():
    if is_enabled.get():
        status_label.config(text="Feature Enabled", foreground="green")
    else:
        status_label.config(text="Feature Disabled", foreground="red")

toggle_button = ttk.Checkbutton(
    root,
    text="Enable Feature",
    variable=is_enabled,
    command=toggle_state
)
toggle_button.pack(pady=5)

status_label = ttk.Label(root, text="Feature Disabled", foreground="red")
status_label.pack(pady=5)

root.mainloop()
Entry widgets capture user input and form the foundation of interactive applications. They’re essential for login forms, calculators, and data entry applications.
import tkinter as tk
from tkinter import ttk

root = tk.Tk()
root.title("Entry Field Examples")

# Basic entry field
ttk.Label(root, text="Enter your name:").pack(pady=5)
name_entry = ttk.Entry(root, width=30)
name_entry.pack(pady=5)

# Password entry field
ttk.Label(root, text="Enter password:").pack(pady=5)
password_entry = ttk.Entry(root, width=30, show="*")
password_entry.pack(pady=5)

# Result display area
result_text = tk.Text(root, height=4, width=40)
result_text.pack(pady=10)

def process_input():
    name = name_entry.get()
    password = password_entry.get()

    if name and password:
        result_text.delete(1.0, tk.END)
        result_text.insert(tk.END, f"Welcome, {name}!\nPassword length: {len(password)} characters")
    else:
        result_text.delete(1.0, tk.END)
        result_text.insert(tk.END, "Please fill in all fields!")

submit_button = ttk.Button(root, text="Submit", command=process_input)
submit_button.pack(pady=10)

root.mainloop()
Event-driven programming is a paradigm where your application responds to user actions (events) like clicks, key presses, or mouse movements. This approach makes GUIs interactive and responsive.
Key Event Types:
<Button-1> (left mouse button)<Key>, <Return>, <Escape><Motion>, <Enter>, <Leave><Configure>, <Destroy>Event binding connects user actions to your Python functions. This creates the interactive behavior users expect from desktop applications.
import tkinter as tk
from tkinter import ttk

root = tk.Tk()
root.title("Event Handling Examples")

# Create a text display area
event_log = tk.Text(root, height=10, width=50)
event_log.pack(pady=10)

def log_event(event_type, details=""):
    event_log.insert(tk.END, f"{event_type}: {details}\n")
    event_log.see(tk.END)  # Auto-scroll to bottom

# Mouse event handling
def on_mouse_click(event):
    log_event("Mouse Click", f"Position ({event.x}, {event.y})")

def on_mouse_enter(event):
    log_event("Mouse Enter", "Cursor entered button area")

def on_mouse_leave(event):
    log_event("Mouse Leave", "Cursor left button area")

# Create interactive button
interactive_button = ttk.Button(root, text="Hover and Click Me!")
interactive_button.pack(pady=10)

# Bind events to the button
interactive_button.bind("<Button-1>", on_mouse_click)
interactive_button.bind("<Enter>", on_mouse_enter)
interactive_button.bind("<Leave>", on_mouse_leave)

# Keyboard event handling
def on_key_press(event):
    log_event("Key Press", f"Key: {event.keysym}")

root.bind("<KeyPress>", on_key_press)
root.focus_set()  # Enable keyboard focus

# Clear log functionality
def clear_log():
    event_log.delete(1.0, tk.END)

clear_button = ttk.Button(root, text="Clear Log", command=clear_log)
clear_button.pack(pady=5)

root.mainloop()
Professional Tkinter applications often use class-based approaches for better organization and reusability:
import tkinter as tk
from tkinter import ttk

class EventDemoApp:
    def __init__(self, root):
        self.root = root
        self.root.title("Professional Event Handling")
        self.setup_ui()
        self.bind_events()

    def setup_ui(self):
        self.main_frame = ttk.Frame(self.root, padding="20")
        self.main_frame.pack(fill=tk.BOTH, expand=True)

        self.counter = tk.IntVar(value=0)
        self.counter_label = ttk.Label(
            self.main_frame,
            text="Counter: 0",
            font=("Arial", 16)
        )
        self.counter_label.pack(pady=10)

        self.increment_button = ttk.Button(
            self.main_frame,
            text="Increment (+1)",
            command=self.increment_counter
        )
        self.increment_button.pack(pady=5)

    def bind_events(self):
        self.root.bind("<space>", lambda e: self.increment_counter())
        self.root.bind("<r>", lambda e: self.reset_counter())
        self.root.focus_set()

    def increment_counter(self):
        current_value = self.counter.get()
        self.counter.set(current_value + 1)
        self.counter_label.config(text=f"Counter: {self.counter.get()}")

    def reset_counter(self):
        self.counter.set(0)
        self.counter_label.config(text="Counter: 0")

if __name__ == "__main__":
    root = tk.Tk()
    app = EventDemoApp(root)
    root.mainloop()
This class-based approach provides better code organization and makes it easier to manage complex applications.
Let’s apply everything we’ve learned by creating a functional calculator. This project demonstrates real-world GUI development and provides a portfolio piece you can showcase.
import tkinter as tk
from tkinter import ttk, messagebox

class Calculator:
    def __init__(self, root):
        self.root = root
        self.root.title("Python Tkinter Calculator")
        self.root.geometry("300x400")
        self.root.resizable(False, False)

        # Variables for calculation
        self.display_var = tk.StringVar()
        self.display_var.set("0")
        self.reset_display = False

        self.setup_ui()

    def setup_ui(self):
        # Main frame
        main_frame = ttk.Frame(self.root, padding="10")
        main_frame.pack(fill=tk.BOTH, expand=True)

        # Display screen
        display_frame = ttk.Frame(main_frame)
        display_frame.pack(fill=tk.X, pady=(0, 10))

        display_entry = ttk.Entry(
            display_frame,
            textvariable=self.display_var,
            font=("Arial", 16),
            justify="right",
            state="readonly"
        )
        display_entry.pack(fill=tk.X)

        # Button grid
        button_frame = ttk.Frame(main_frame)
        button_frame.pack(fill=tk.BOTH, expand=True)

        # Define button layout
        buttons = [
            ['C', 'CE', '⌫', '÷'],
            ['7', '8', '9', '×'],
            ['4', '5', '6', '−'],
            ['1', '2', '3', '+'],
            ['±', '0', '.', '=']
        ]

        # Create buttons
        for row, button_row in enumerate(buttons):
            for col, text in enumerate(button_row):
                btn = ttk.Button(
                    button_frame,
                    text=text,
                    command=lambda t=text: self.button_click(t)
                )
                btn.grid(row=row, column=col, sticky="nsew", padx=1, pady=1)

        # Configure grid weights for responsive design
        for i in range(5):  # 5 rows
            button_frame.grid_rowconfigure(i, weight=1)
        for j in range(4):  # 4 columns
            button_frame.grid_columnconfigure(j, weight=1)

    def button_click(self, char):
        try:
            if char.isdigit() or char == '.':
                self.handle_number(char)
            elif char in '+-×÷':
                self.handle_operator(char)
            elif char == '=':
                self.calculate()
            elif char == 'C':
                self.clear_all()
            elif char == 'CE':
                self.clear_entry()
            elif char == '⌫':
                self.backspace()
            elif char == '±':
                self.toggle_sign()
        except Exception as e:
            messagebox.showerror("Error", f"Calculation error: {str(e)}")
            self.clear_all()

    def handle_number(self, char):
        current = self.display_var.get()
        if self.reset_display or current == "0":
            self.display_var.set(char)
            self.reset_display = False
        else:
            if char == '.' and '.' in current:
                return  # Prevent multiple decimal points
            self.display_var.set(current + char)

    def handle_operator(self, op):
        current = self.display_var.get()
        # Convert display operators to Python operators
        op_map = {'×': '*', '÷': '/', '−': '-'}
        python_op = op_map.get(op, op)

        if current and current[-1] not in '+-*/':
            self.display_var.set(current + python_op)
        self.reset_display = False

    def calculate(self):
        try:
            expression = self.display_var.get()
            # Replace display operators with Python operators
            expression = expression.replace('×', '*').replace('÷', '/').replace('−', '-')
            result = eval(expression)
            self.display_var.set(str(result))
            self.reset_display = True
        except ZeroDivisionError:
            messagebox.showerror("Error", "Cannot divide by zero!")
            self.clear_all()
        except:
            messagebox.showerror("Error", "Invalid expression!")
            self.clear_all()

    def clear_all(self):
        self.display_var.set("0")
        self.reset_display = False

    def clear_entry(self):
        self.display_var.set("0")

    def backspace(self):
        current = self.display_var.get()
        if len(current) > 1:
            self.display_var.set(current[:-1])
        else:
            self.display_var.set("0")

    def toggle_sign(self):
        current = self.display_var.get()
        if current.startswith('-'):
            self.display_var.set(current[1:])
        else:
            self.display_var.set('-' + current)

if __name__ == "__main__":
    root = tk.Tk()
    calculator = Calculator(root)
    root.mainloop()
This calculator demonstrates professional Tkinter development practices including:
For more Python project ideas, check out our guides on creating a snake game and building a simple password generator.
Code Organization:
Performance Optimization:
update_idletasks() for heavy computationsUser Experience Guidelines:
Layout Manager Confusion: Never mix pack(), grid(), and place() in the same container. This causes layout conflicts and unpredictable behavior.
Memory Leaks: Always properly destroy windows and unbind events when they’re no longer needed:
# Proper window cleanup
def close_window():
    window.destroy()

window.protocol("WM_DELETE_WINDOW", close_window)
Poor Error Handling: Always wrap user input processing in try-catch blocks to prevent crashes:
try:
    user_number = int(entry.get())
    result = 100 / user_number
except ValueError:
    messagebox.showerror("Error", "Please enter a valid number")
except ZeroDivisionError:
    messagebox.showerror("Error", "Cannot divide by zero")
Threading Issues: Never update GUI elements from background threads. Use after() method instead:
def update_progress():
    # Safe GUI update from background task
    root.after(100, lambda: progress_var.set(progress_var.get() + 1))
Once you’ve mastered the basics, explore these advanced topics:
Custom Widget Creation: Build reusable components for consistent UI design Menu Systems: Add professional menu bars and context menus Dialogs and Modal Windows: Create popup windows for user interactions Canvas Graphics: Draw custom graphics and animations Threading Integration: Build responsive applications with background processing
After mastering Tkinter, consider exploring:
Build impressive projects to showcase your skills:
Absolutely! While Tkinter has limitations compared to modern frameworks, it’s perfectly capable of creating professional desktop applications. Many commercial software products use Tkinter for their interfaces.
Yes, using the ttk (themed Tkinter) module provides native operating system styling. You can also customize colors, fonts, and layouts to create contemporary interfaces.
Tkinter creates native desktop applications that don’t require a browser or internet connection. They typically have better performance and system integration compared to web apps.
Yes! Tools like PyInstaller, cx_Freeze, and auto-py-to-exe can package your Tkinter applications into standalone executables for Windows, macOS, and Linux.
If you’re comfortable with basic Python concepts like variables and functions, you can create simple Tkinter applications within a few hours. Building complex applications may take weeks of practice.
Congratulations! You’ve completed a comprehensive journey through Python Tkinter fundamentals. You’ve learned to create windows, handle user interactions, manage layouts, and build complete applications like our calculator project.
Key takeaways from this tutorial:
Ready to take your Python GUI skills to the next level? Start building your own projects using the concepts you’ve learned. Whether you’re creating educational games or practical applications, Tkinter provides the foundation you need.
Join thousands of students who have transformed their programming abilities through hands-on GUI development. Your journey into creating engaging, interactive applications starts now!


